Backend Services Deployment
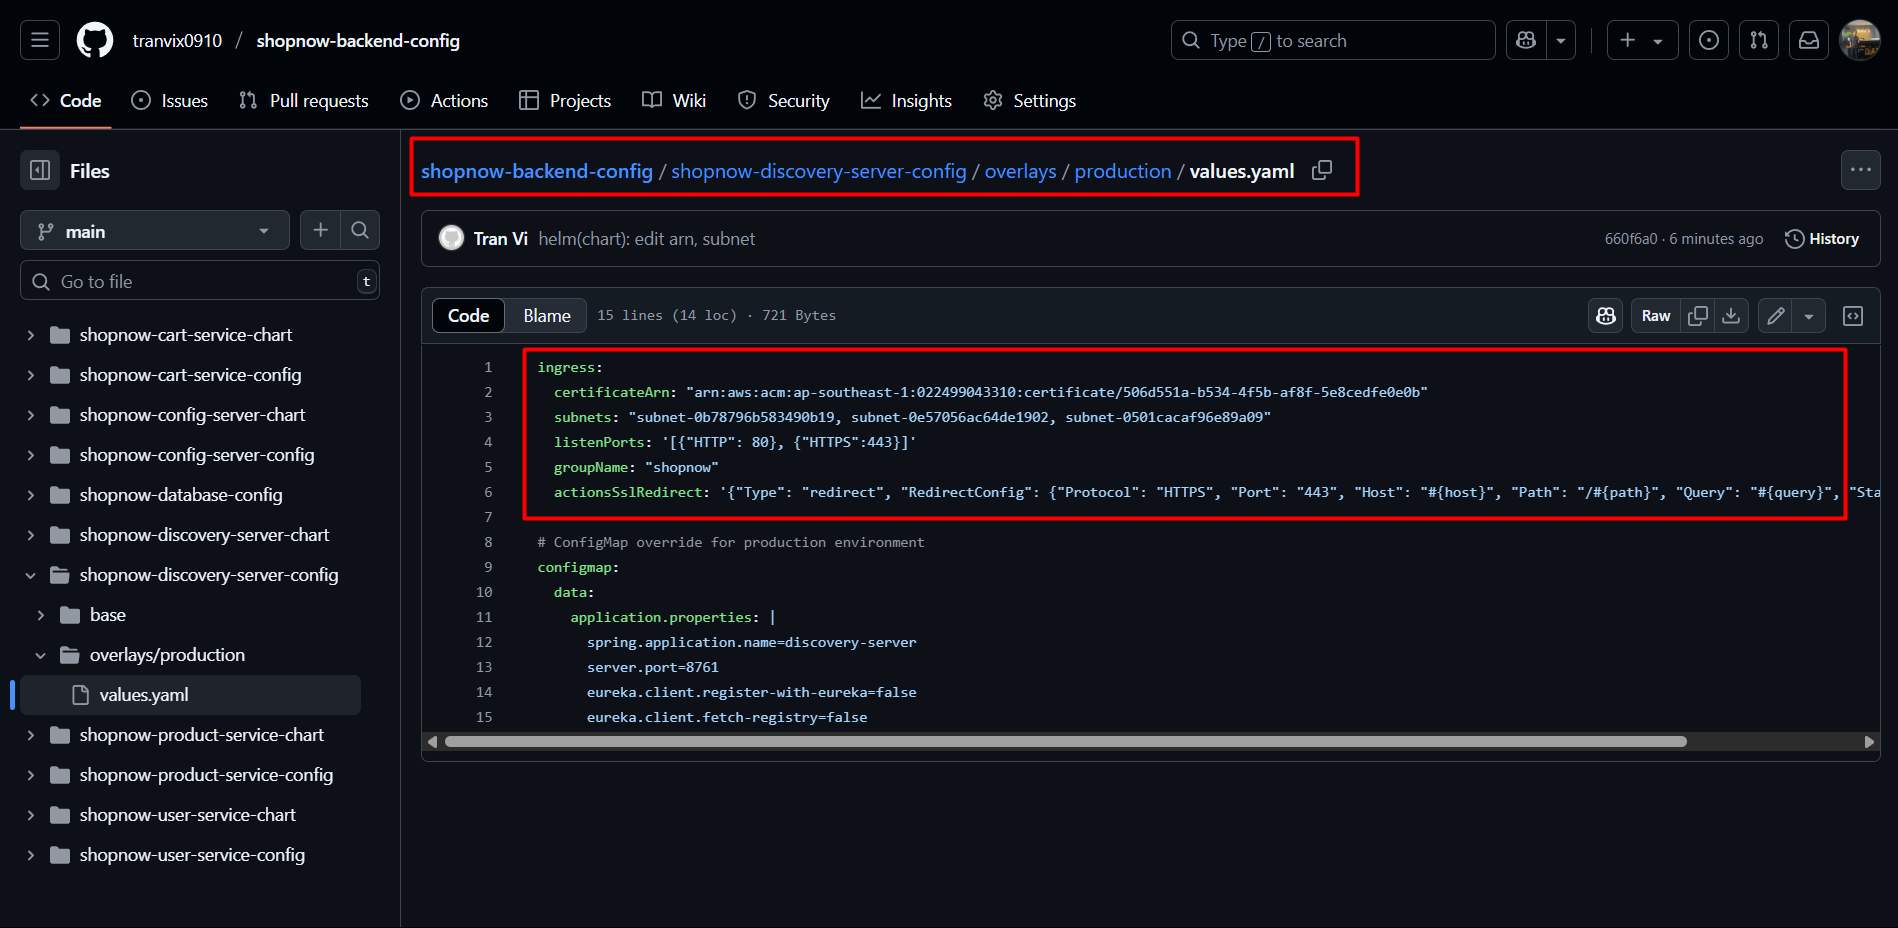
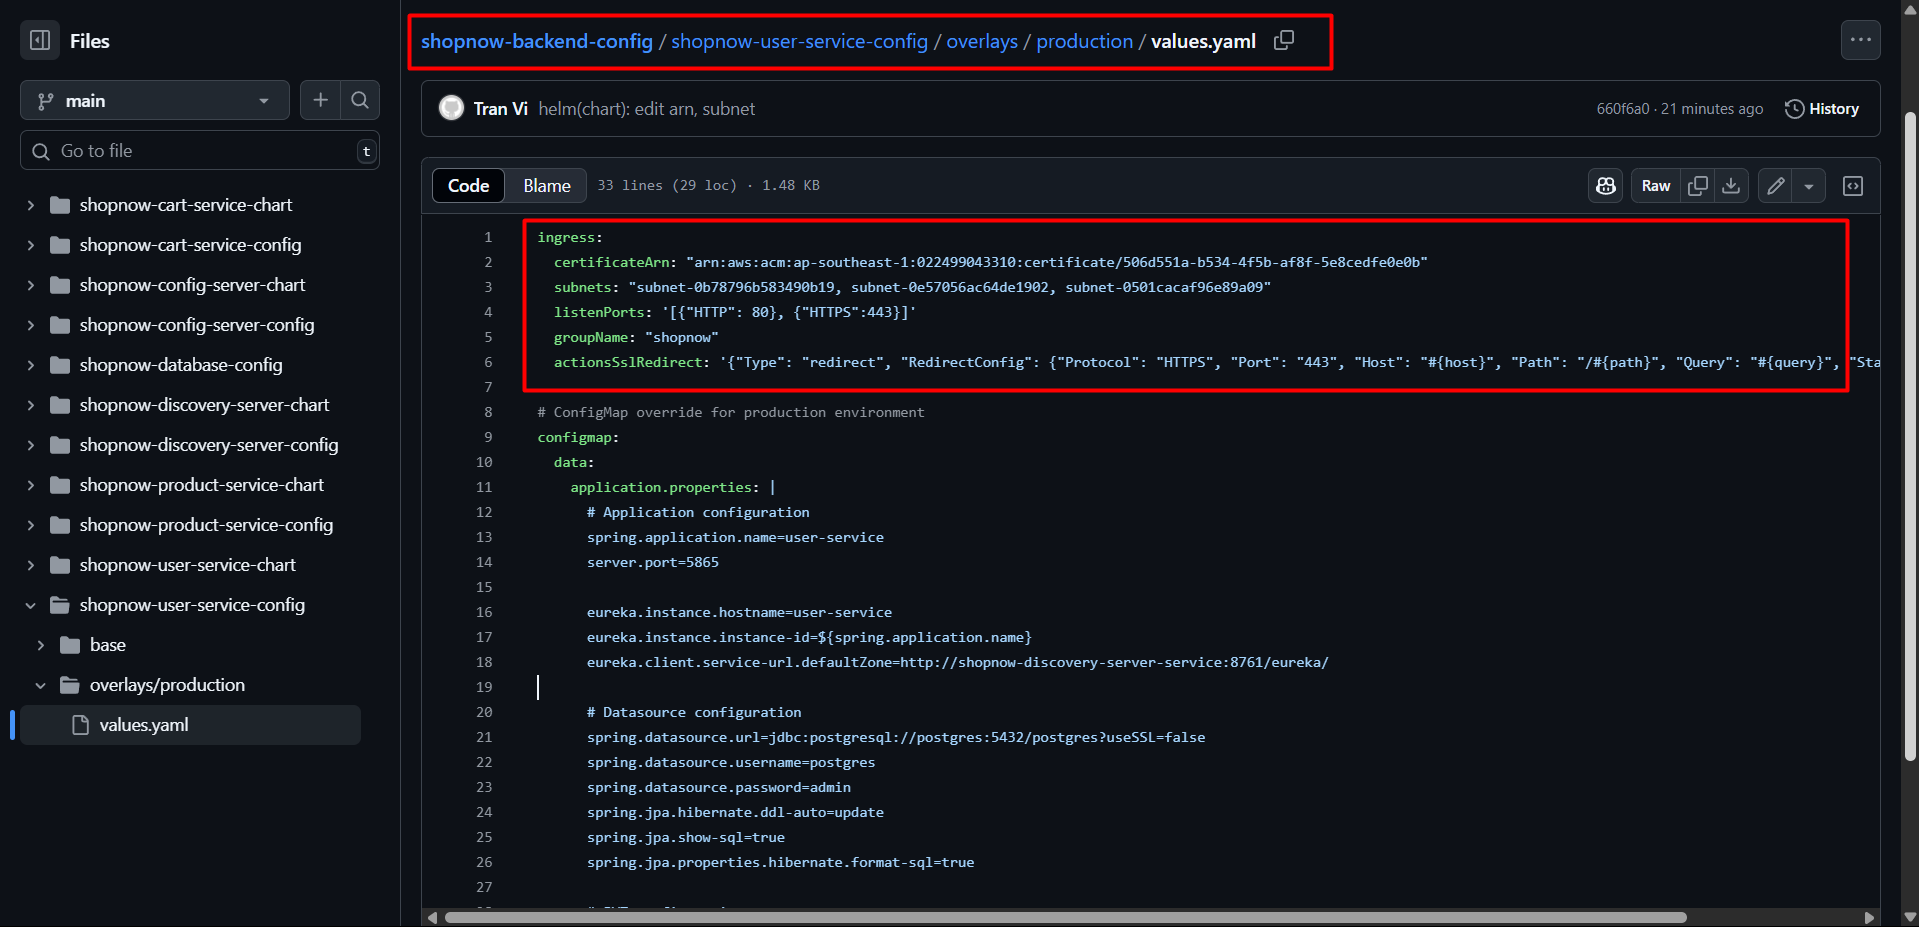
When deploying Services, you should change parameters such as ARN and Public Subnet.
Similar to when deploying Frontend Services, we will deploy Backend Services by building and pushing Docker images to ECR and deploying using Helm Chart with ArgoCD.
The steps to build and push Docker images to ECR have been performed in the Frontend Services deployment section 6.1. Frontend Services Deployment. So this section only presents the steps to deploy Backend Services.
Deploy Discovery Server
Edit the appropriate parameters to deploy Ingress.
Access ArgoCD and proceed to deploy Discovery Server with the following YAML file:
apiVersion: argoproj.io/v1alpha1
kind: Application
metadata:
  name: shopnow-discovery-server
  namespace: argocd
spec:
  destination:
    namespace: shopnow
    server: https://kubernetes.default.svc
  source:
    path: shopnow-discovery-server-chart
    repoURL: https://github.com/tranvix0910/shopnow-backend-config.git
    targetRevision: main
    helm:
      valueFiles:
        - values.yaml
        - ../shopnow-discovery-server-config/overlays/production/values.yaml
      values: |
        image:
          repository: "<ACCOUNT_ID>.dkr.ecr.ap-southeast-1.amazonaws.com/shopnow/shopnow-discovery-server"
  project: shopnow
  syncPolicy:
    automated:
      prune: true
      selfHeal: true
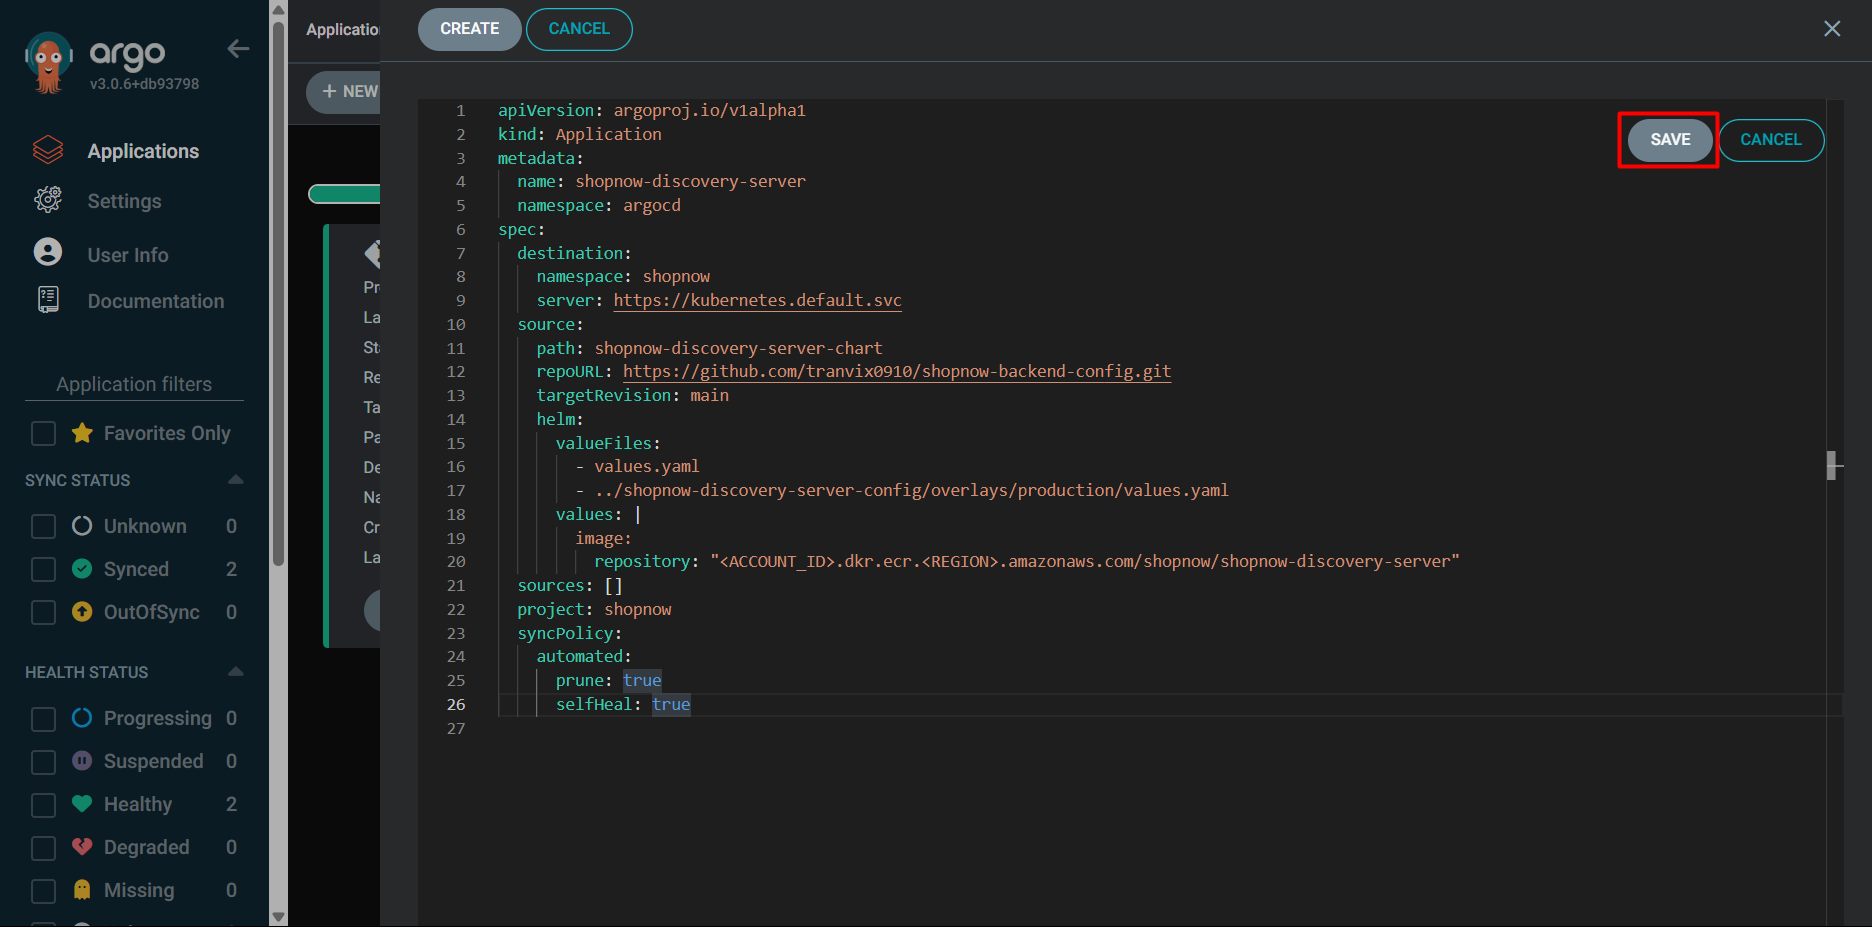
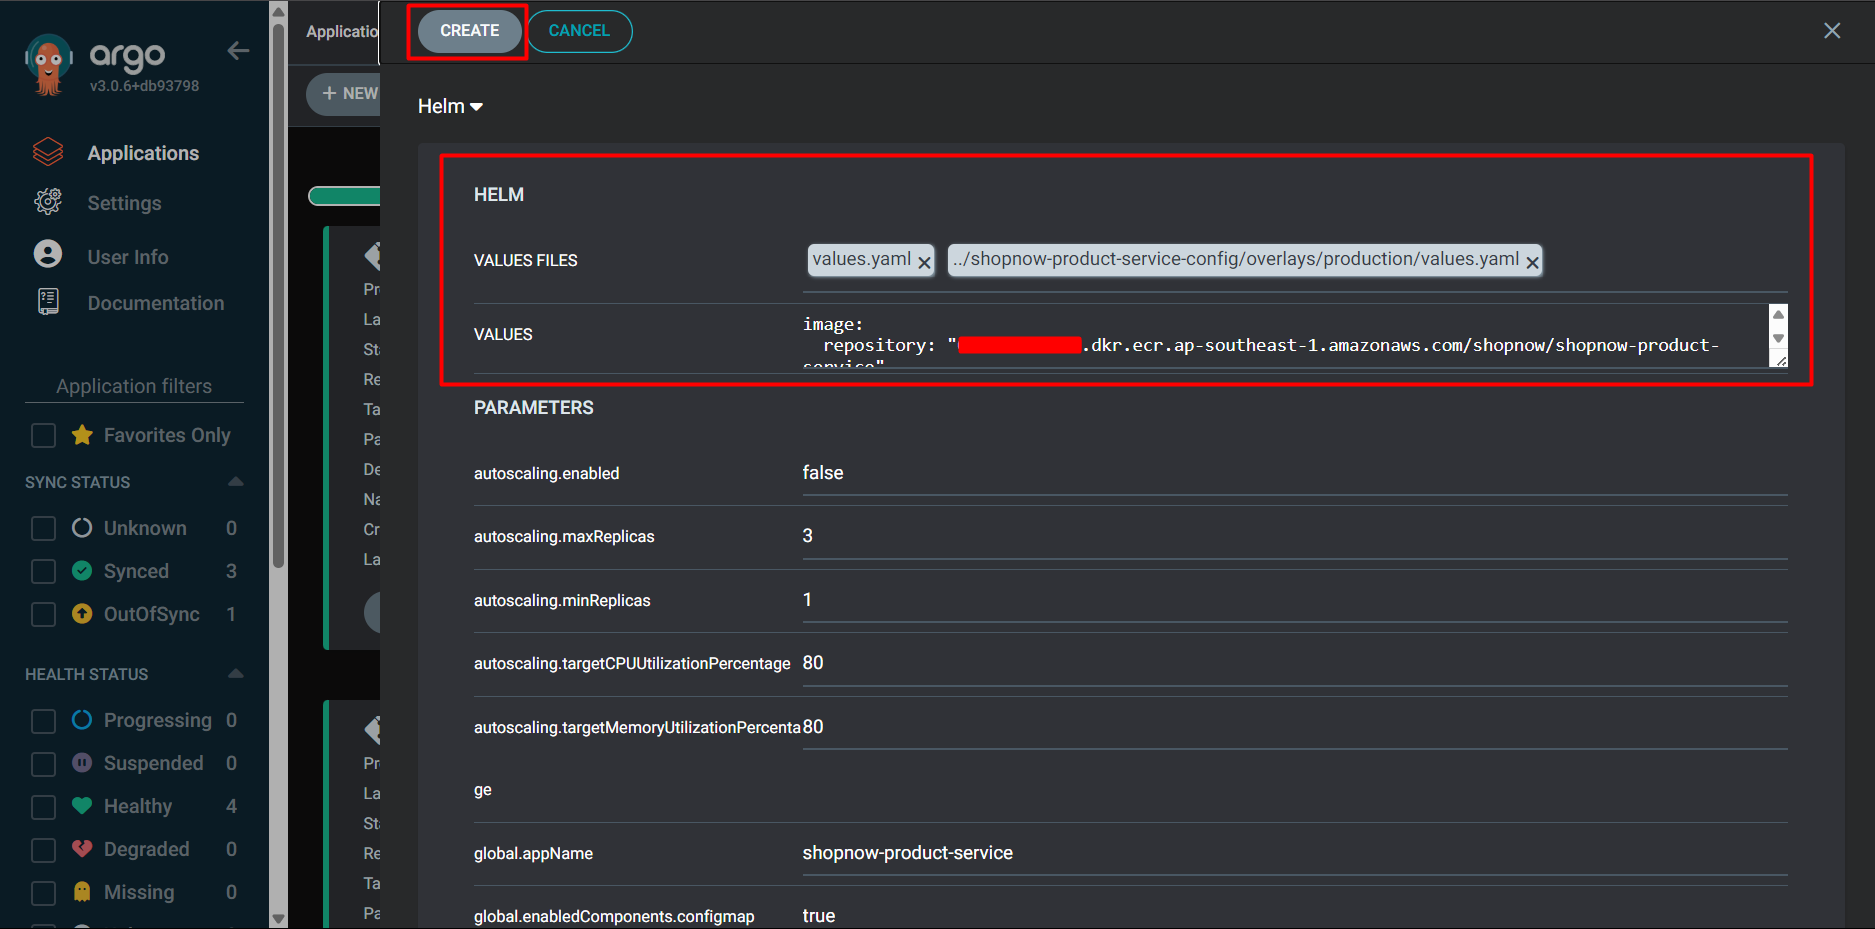
After clicking Save, scroll down we can see ArgoCD updating the necessary information. If it displays as follows, the configuration is correct.
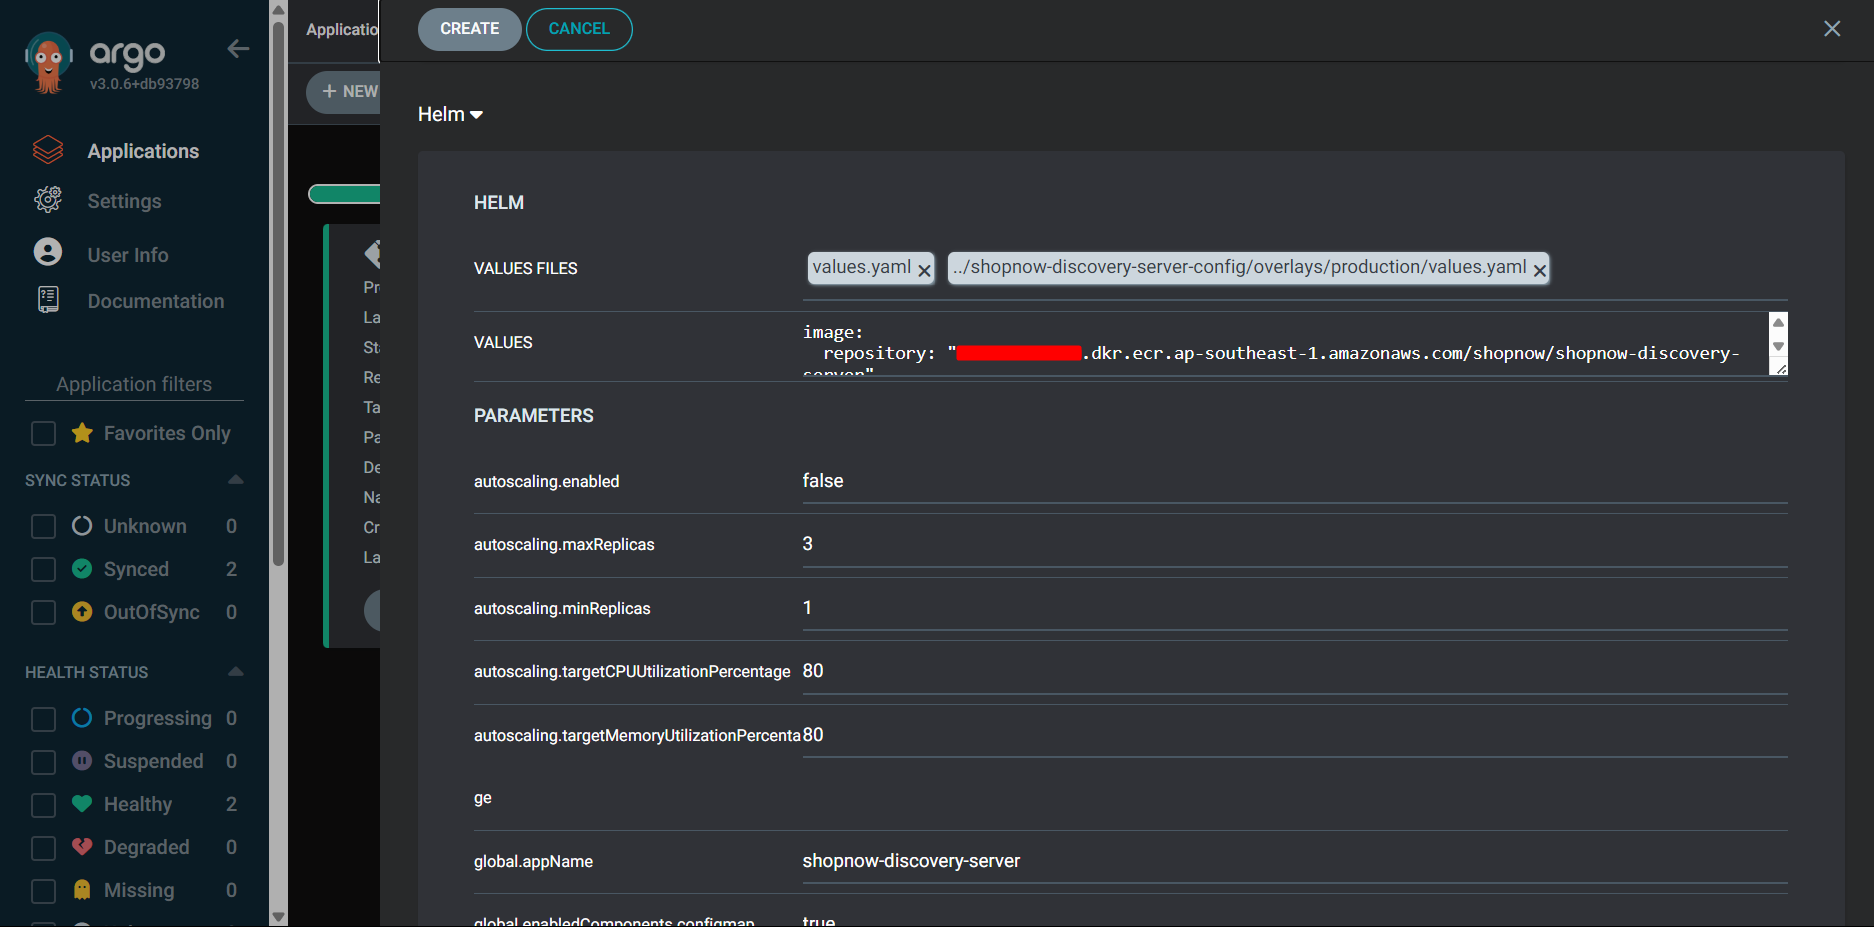
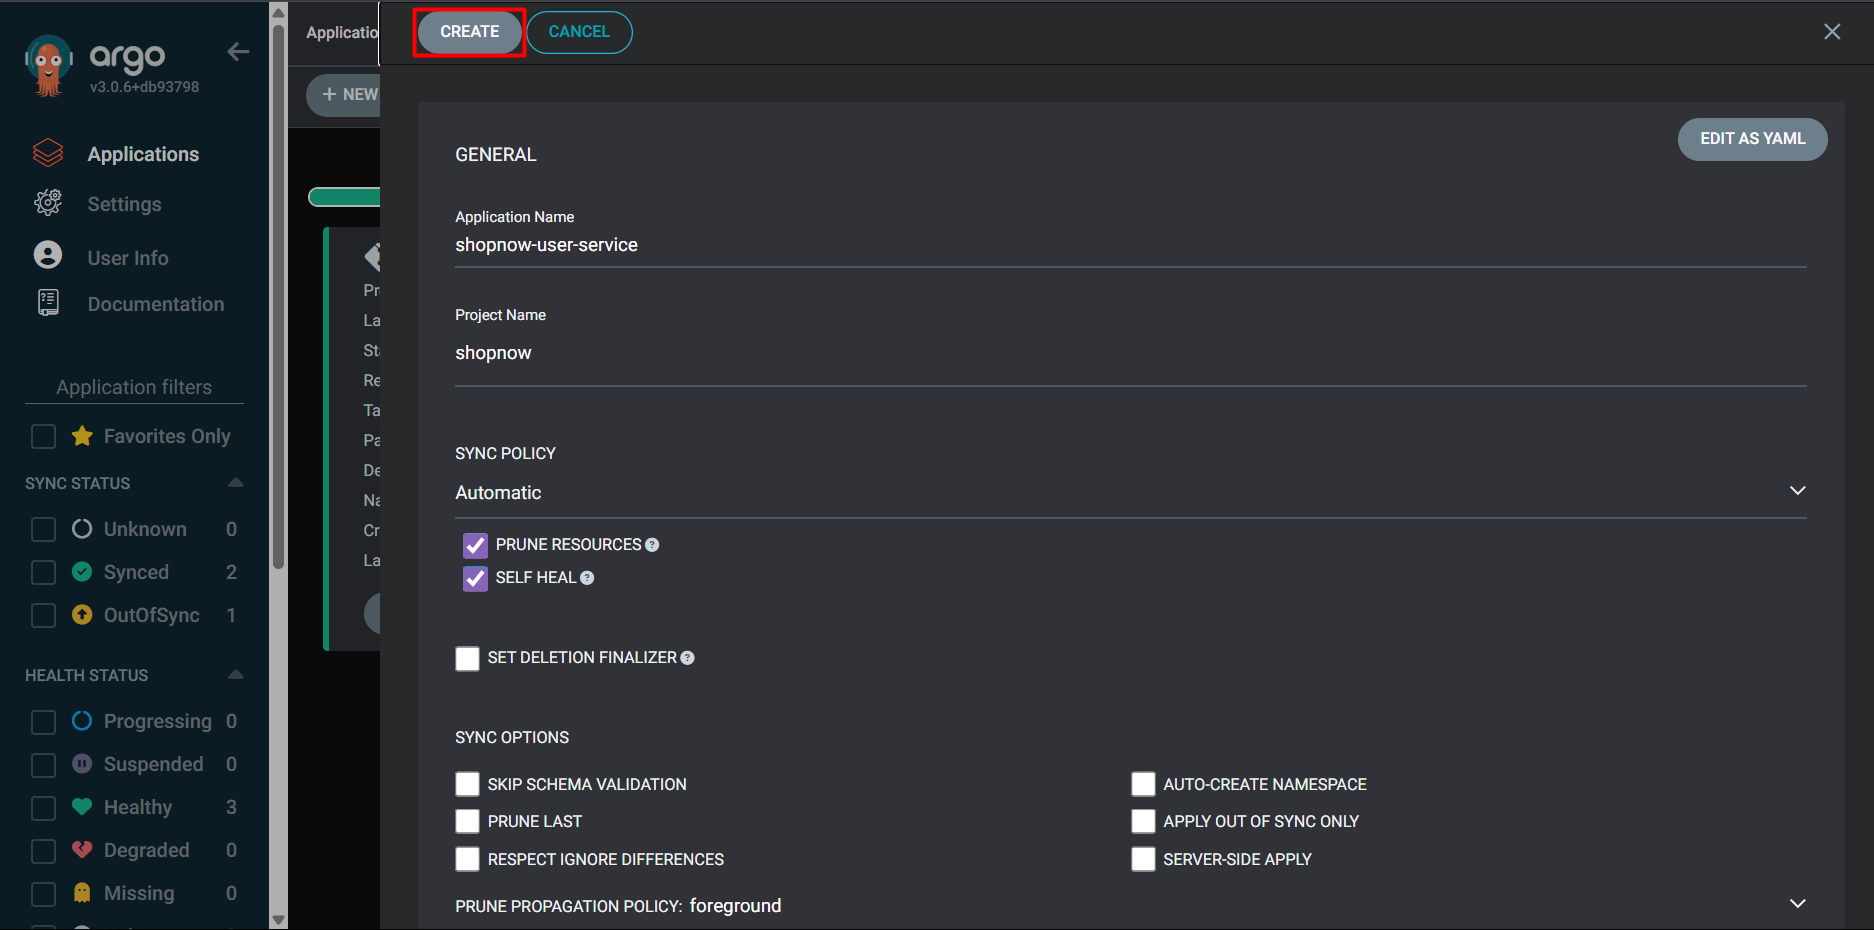
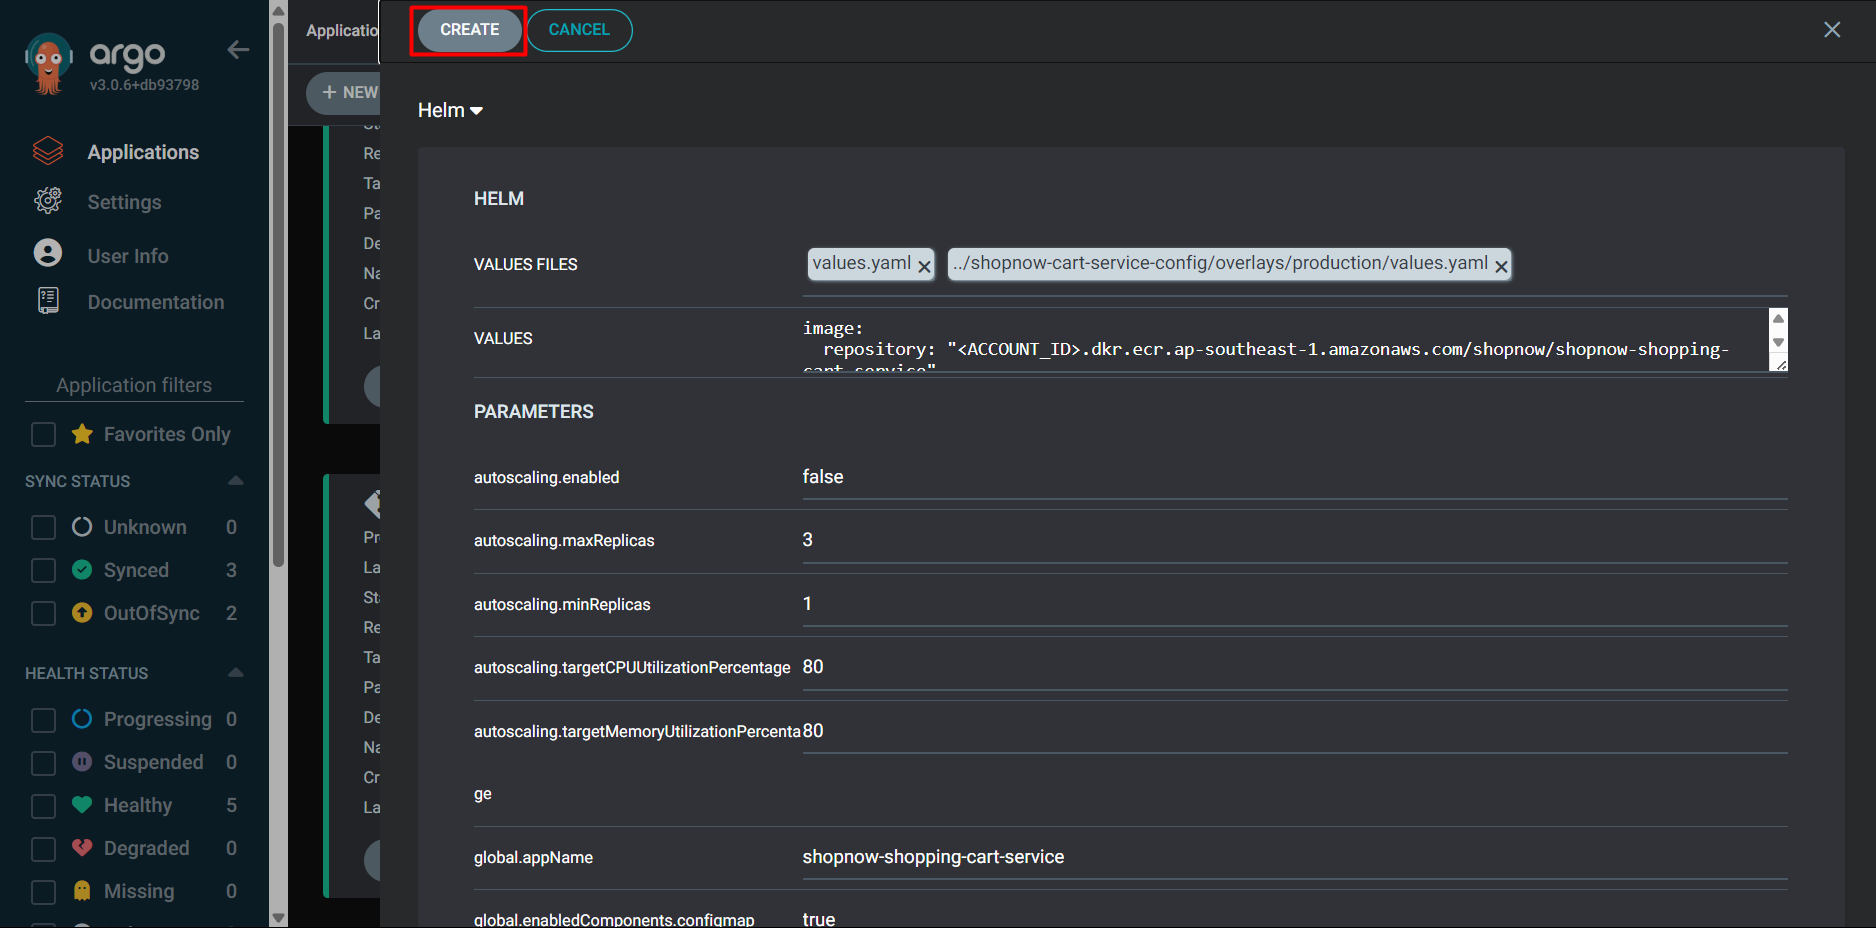
Select Create to create the Application.
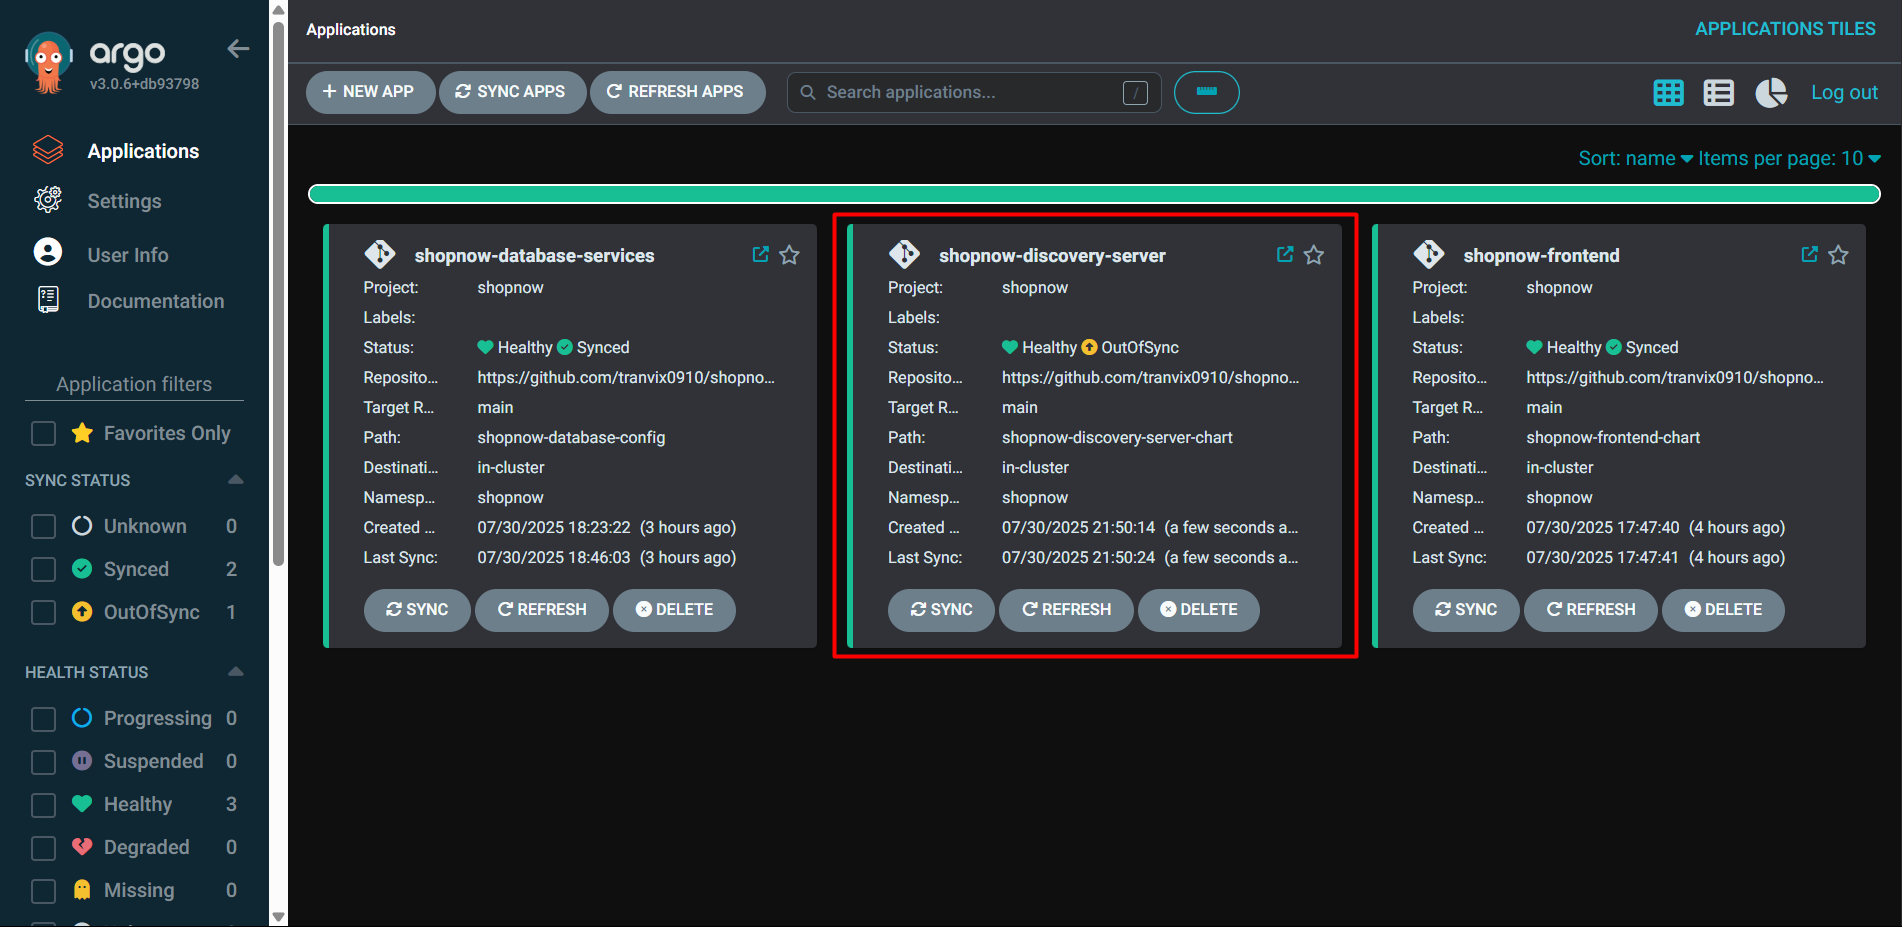
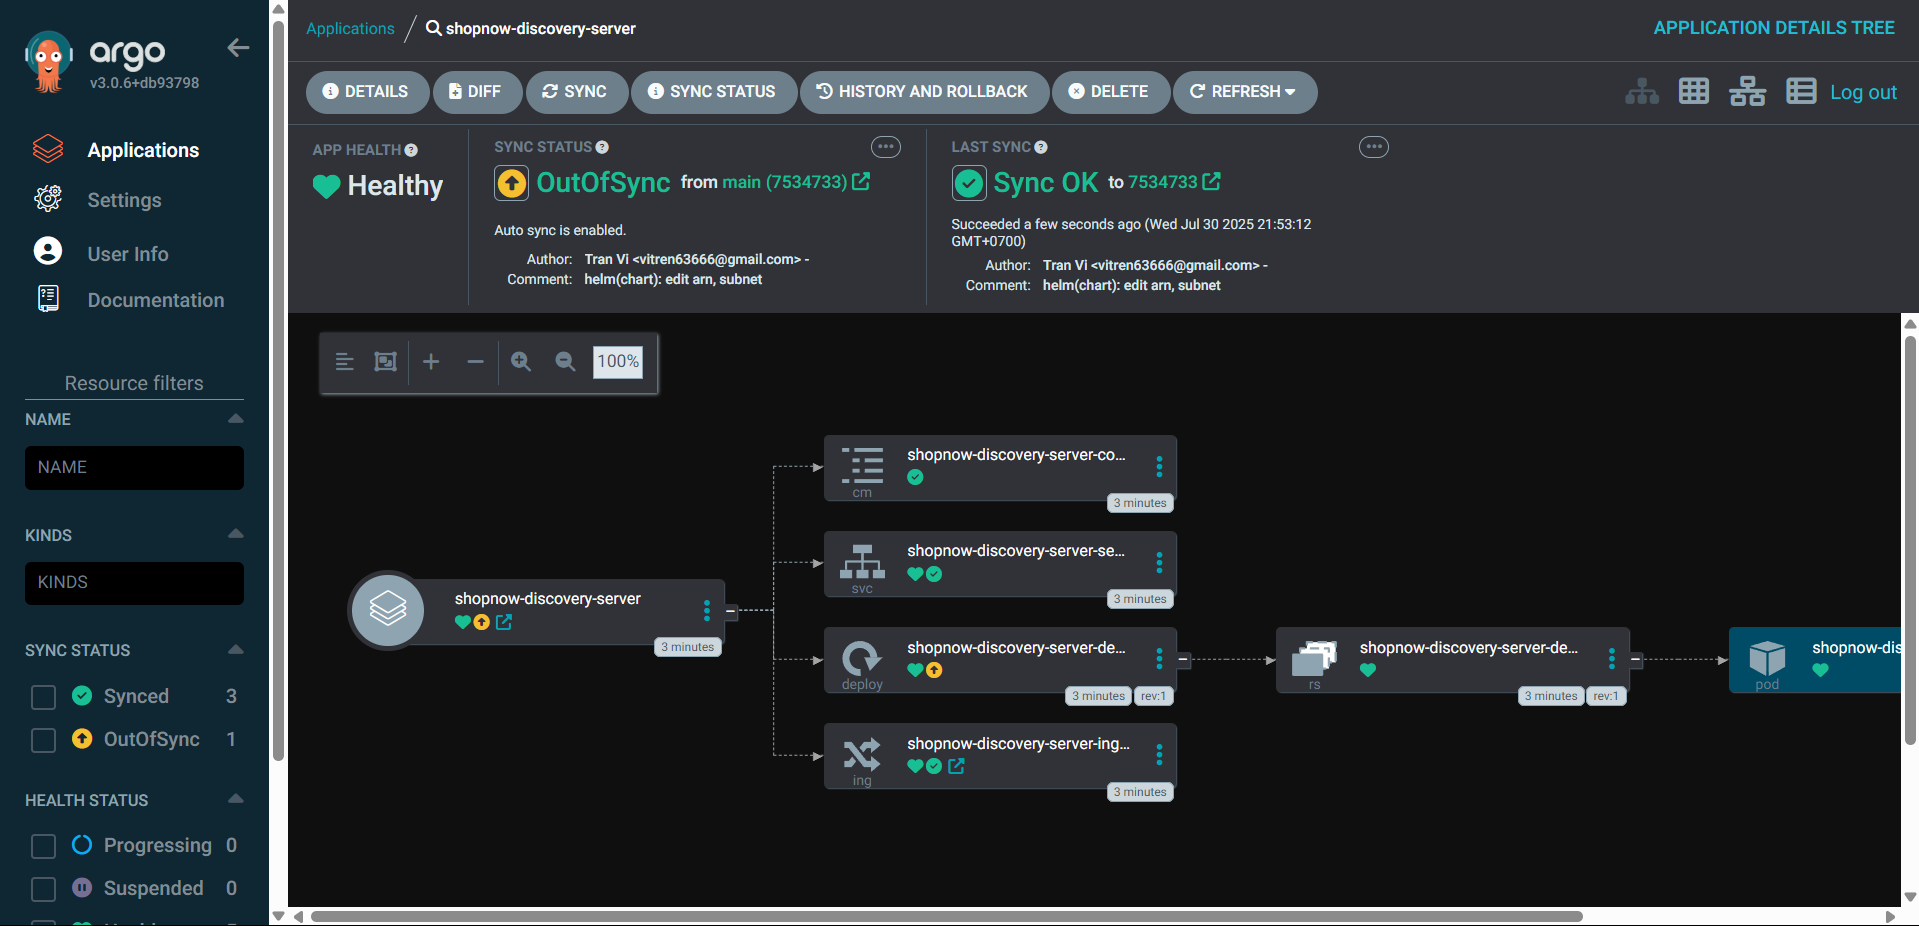
Thus, we have successfully deployed Discovery Server.
Proceed to Route 53 to configure DNS for Discovery Server.
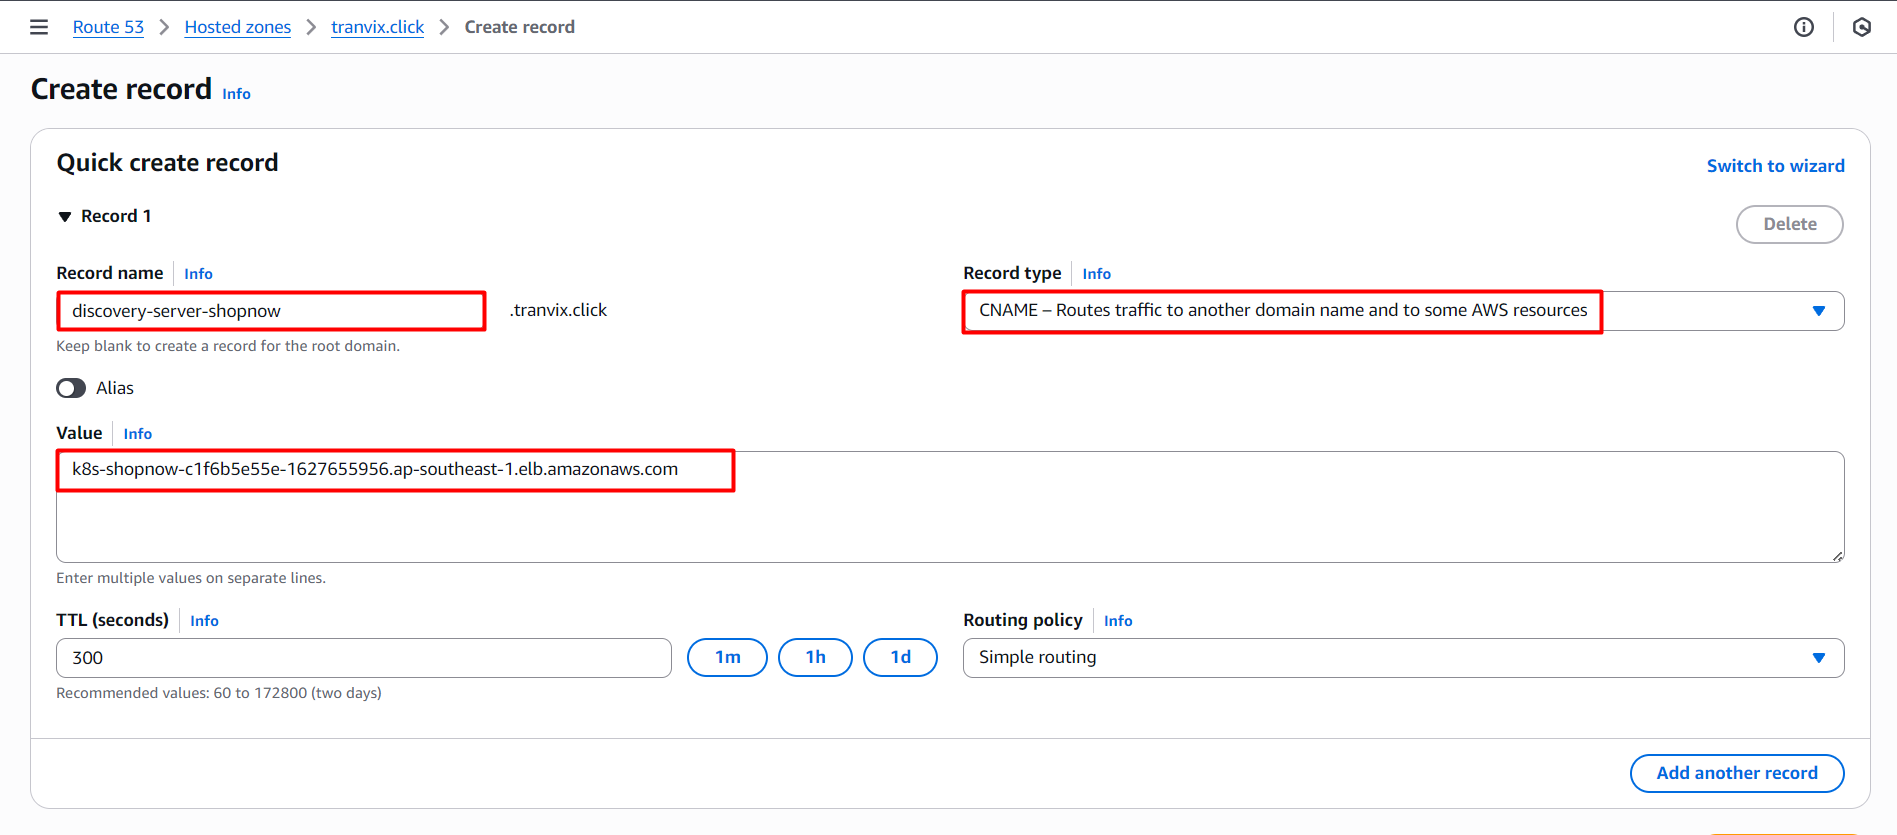
After successfully creating the Record, we can access Discovery Server through DNS discovery-server-shopnow.tranvix.click.
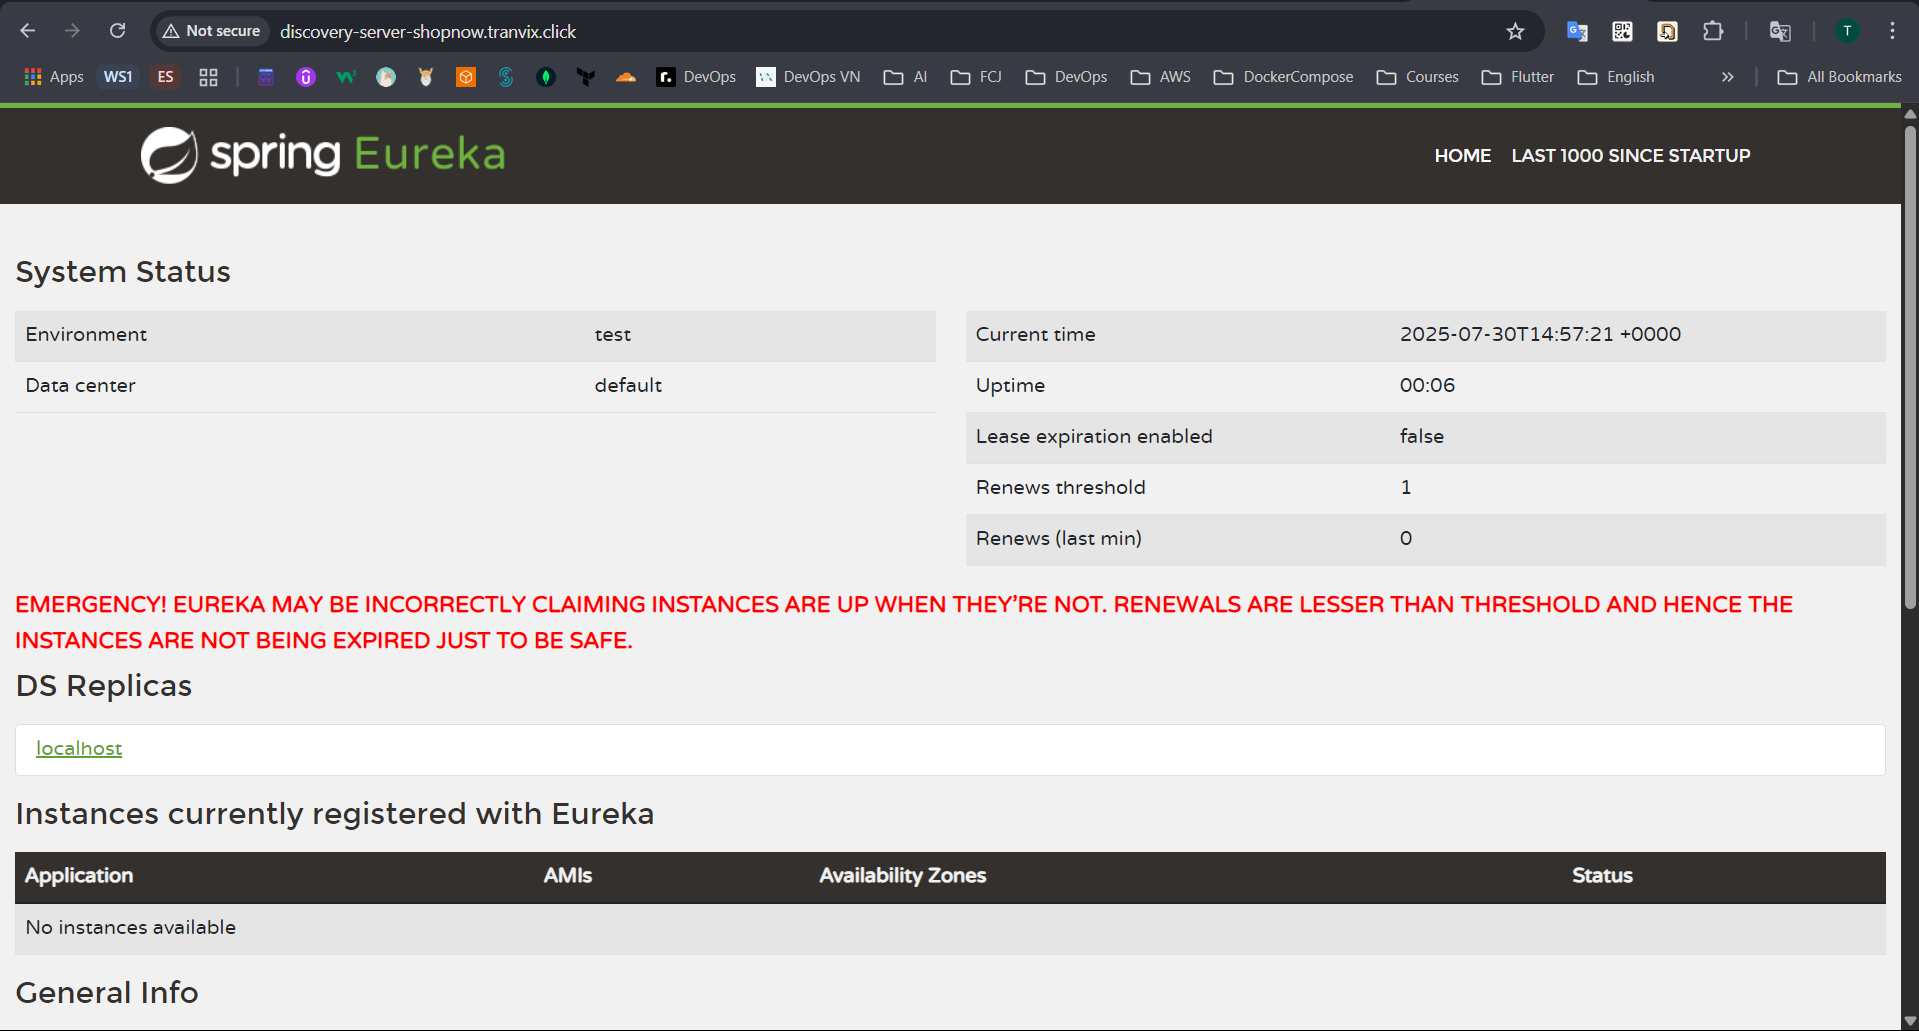
Thus, we have successfully deployed Discovery Server. However, since no Service has been deployed yet, Discovery Server has warnings.
User Service
Edit the appropriate parameters to deploy Ingress.
Access ArgoCD and proceed to deploy User Service with the following YAML file:
apiVersion: argoproj.io/v1alpha1
kind: Application
metadata:
  name: shopnow-user-service
  namespace: argocd
spec:
  destination:
    namespace: shopnow
    server: https://kubernetes.default.svc
  source:
    path: shopnow-user-service-chart
    repoURL: https://github.com/tranvix0910/shopnow-backend-config.git
    targetRevision: main
    helm:
      valueFiles:
        - values.yaml
        - ../shopnow-user-service-config/overlays/production/values.yaml
      values: |
        image:
          repository: "<ACCOUNT_ID>.dkr.ecr.ap-southeast-1.amazonaws.com/shopnow/shopnow-user-service"
  project: shopnow
  syncPolicy:
    automated:
      prune: true
      selfHeal: true
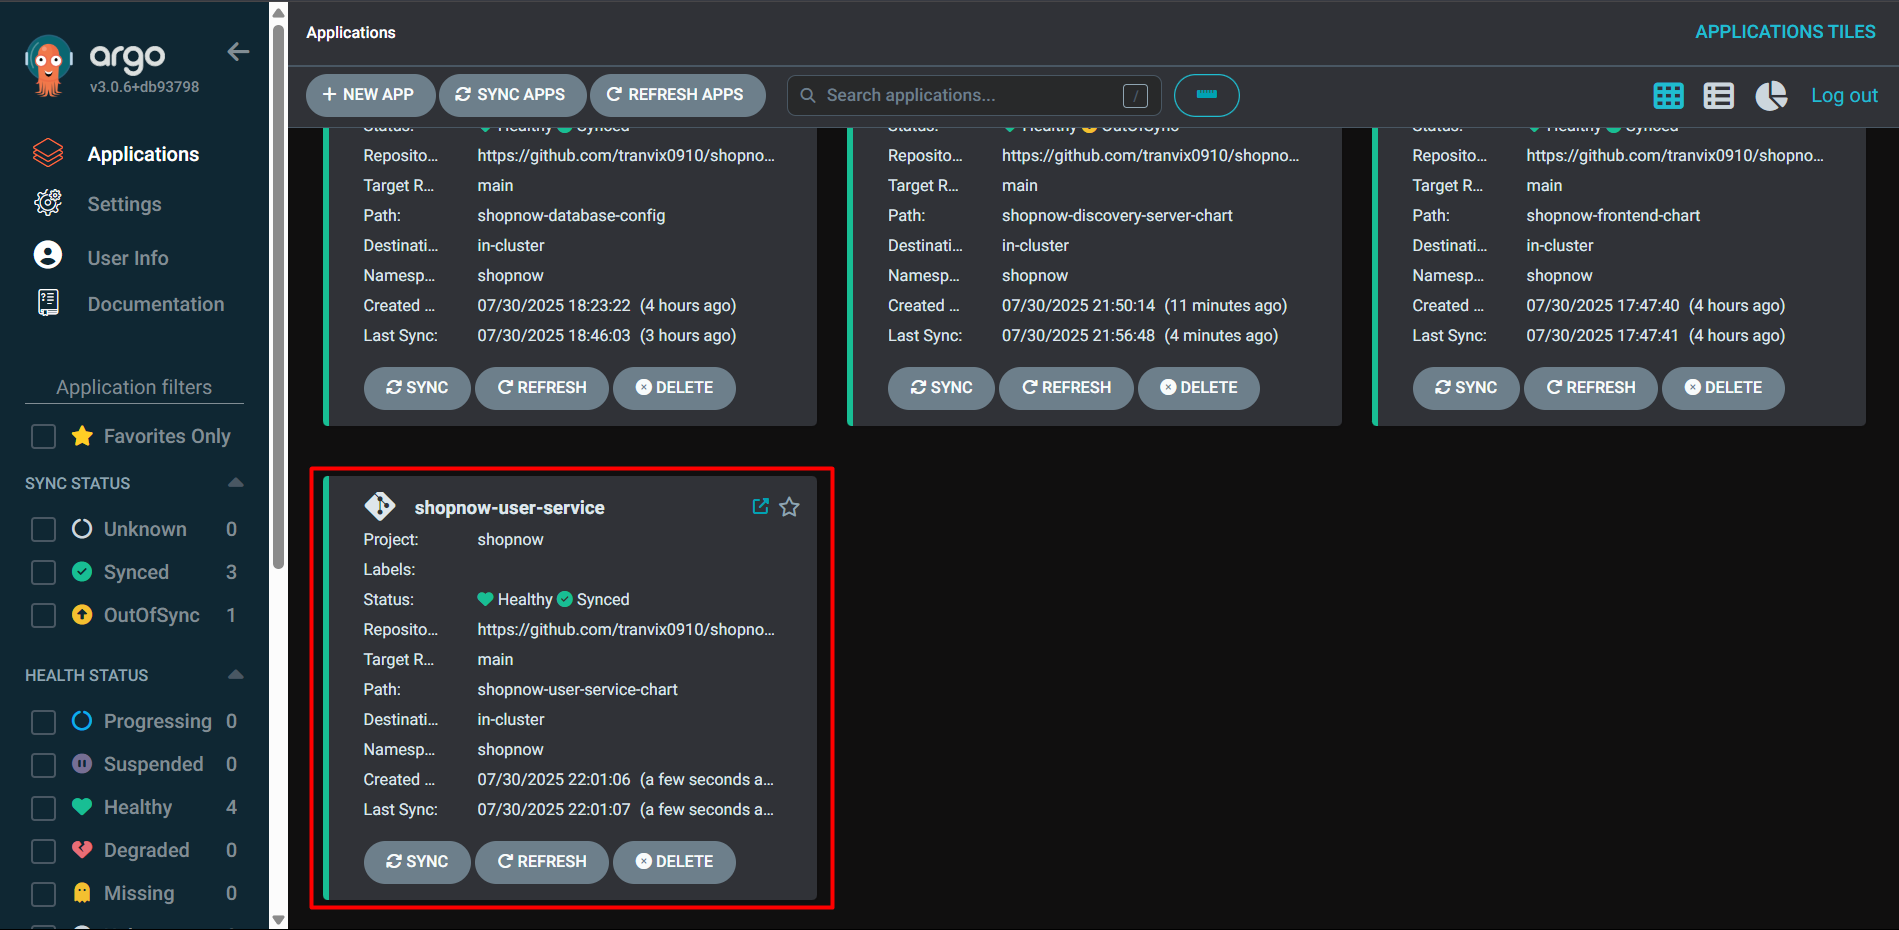
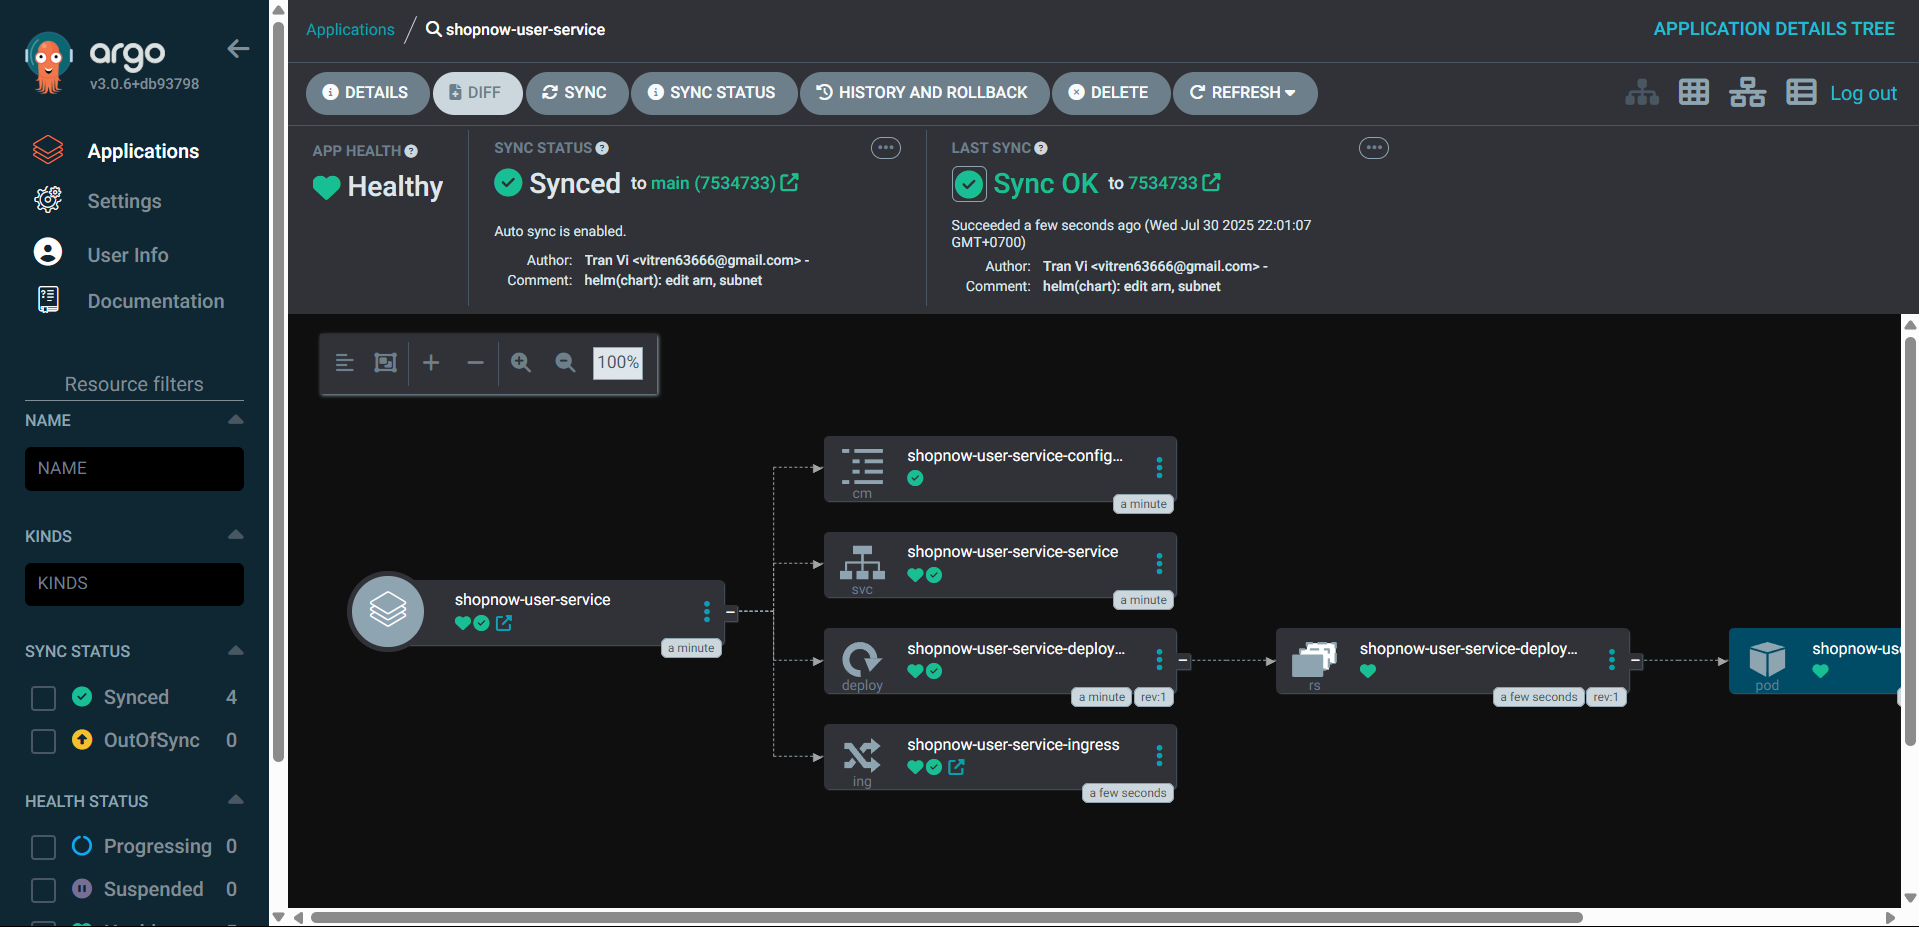
Thus, we have successfully deployed User Service.
Proceed to Route 53 to configure DNS for User Service.
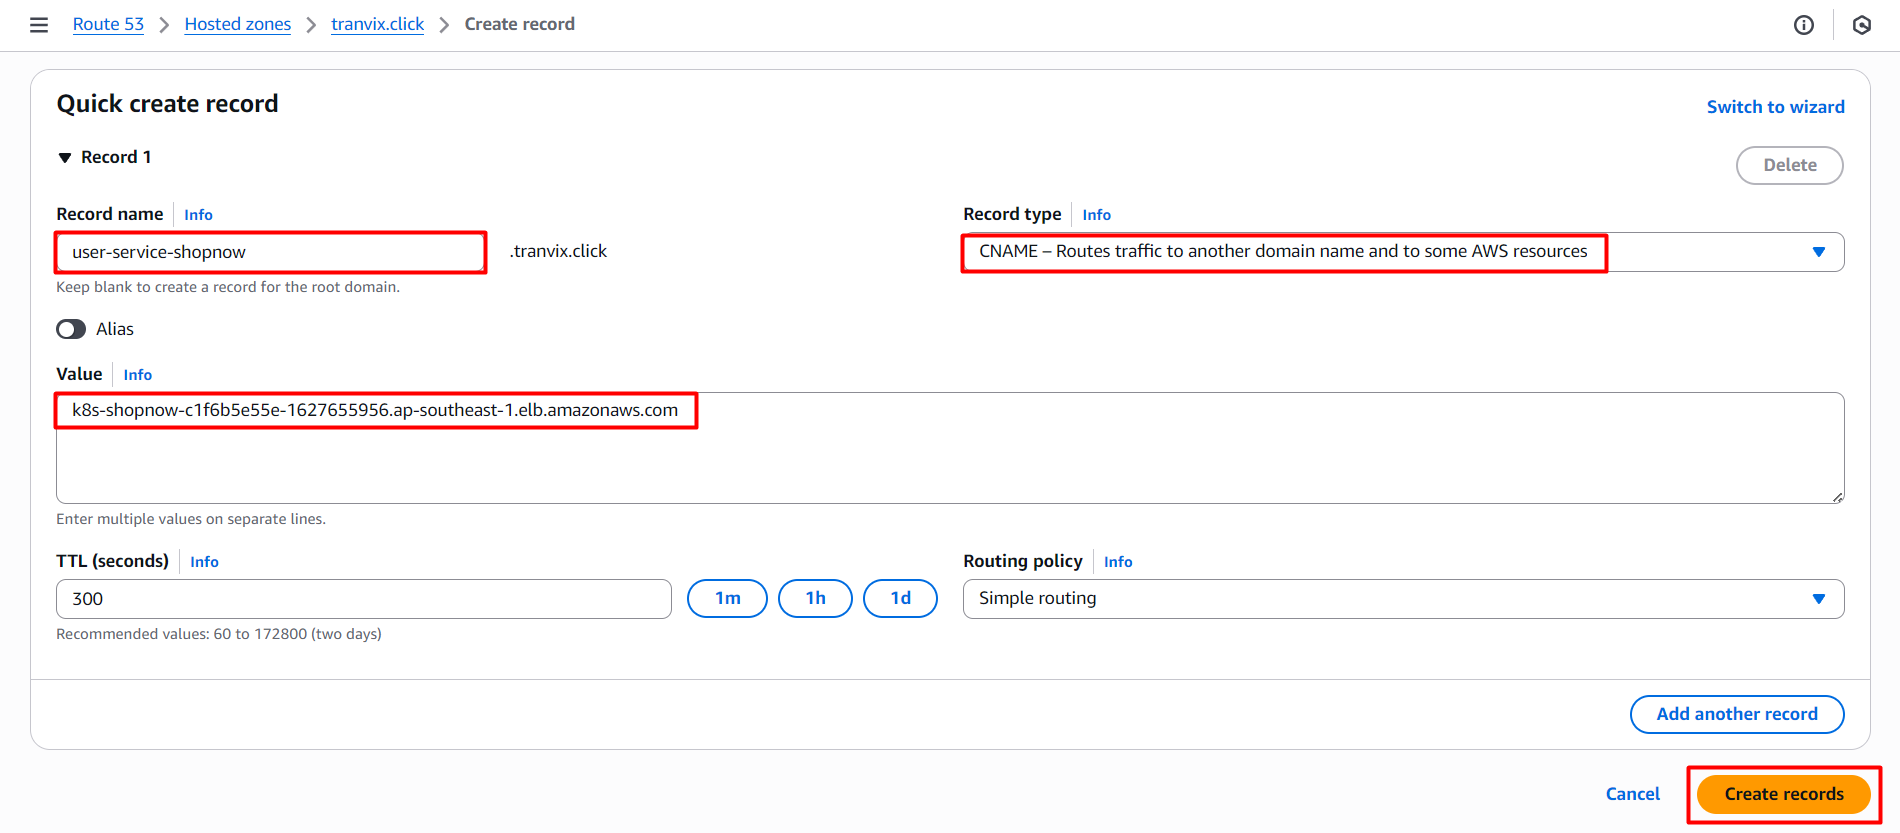
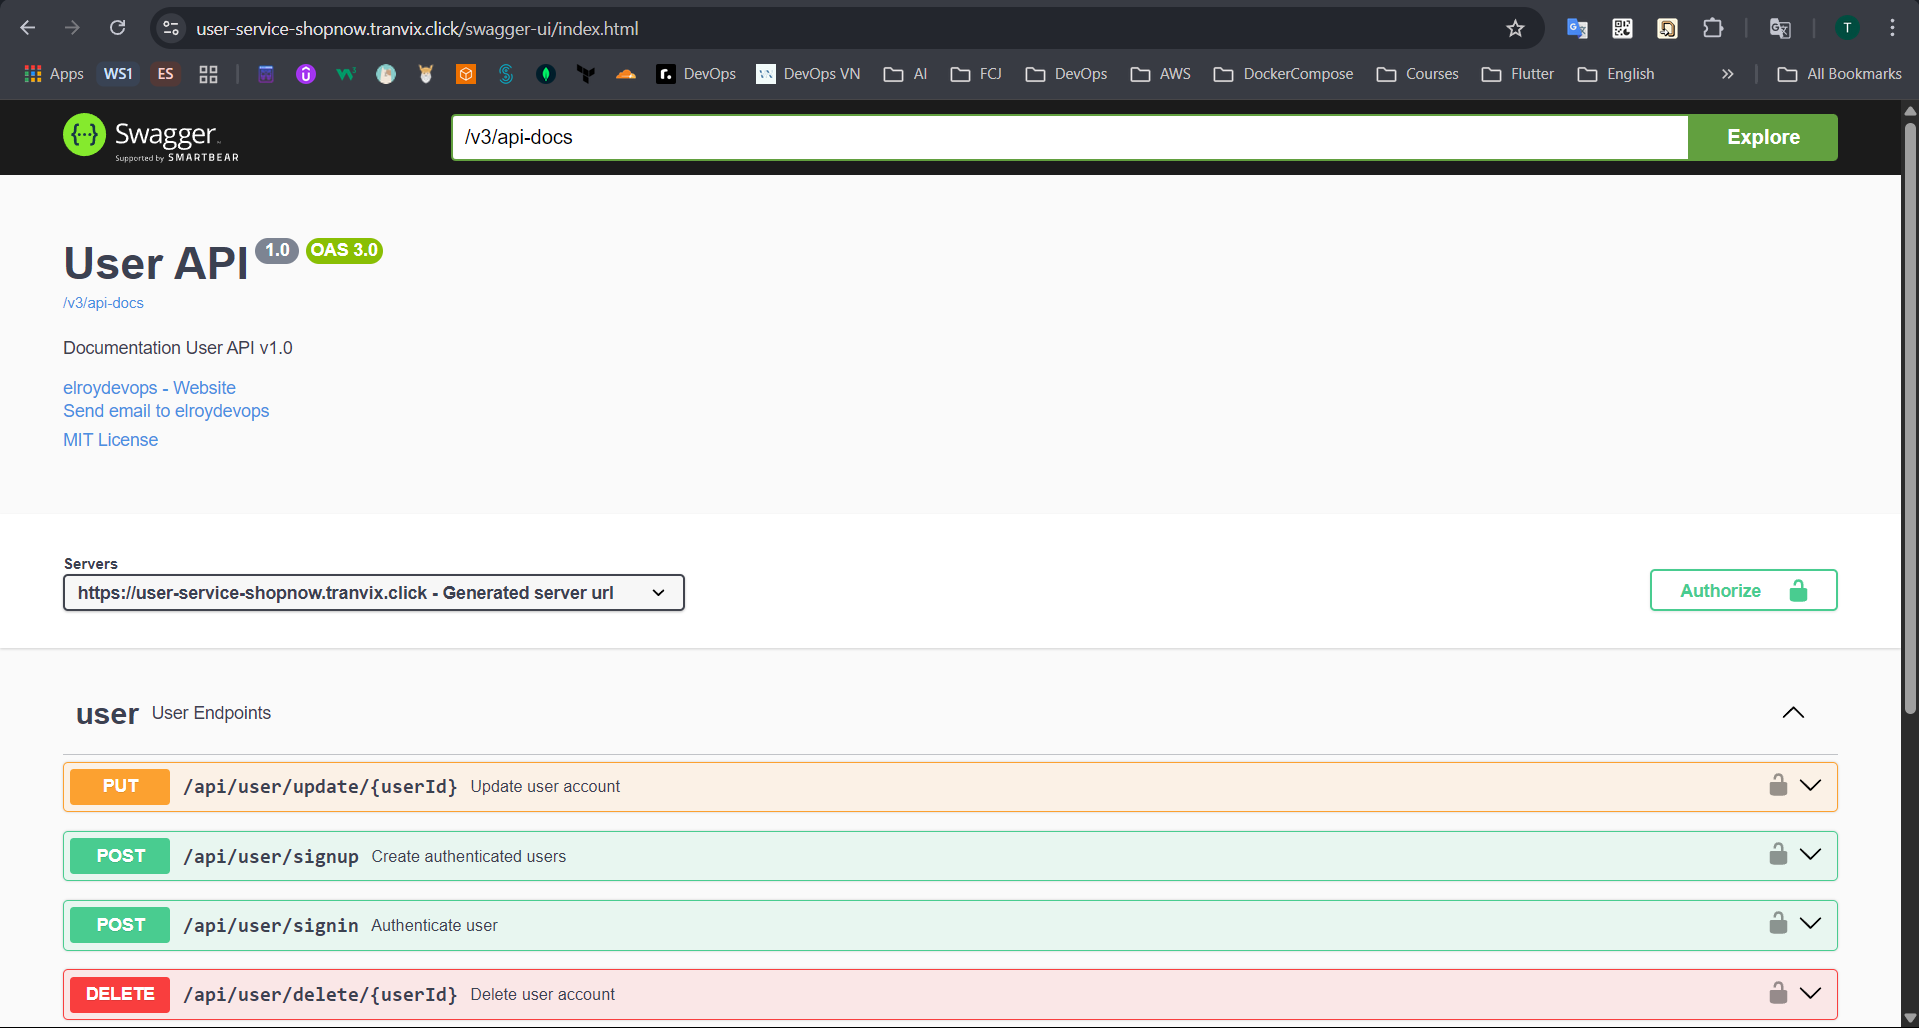
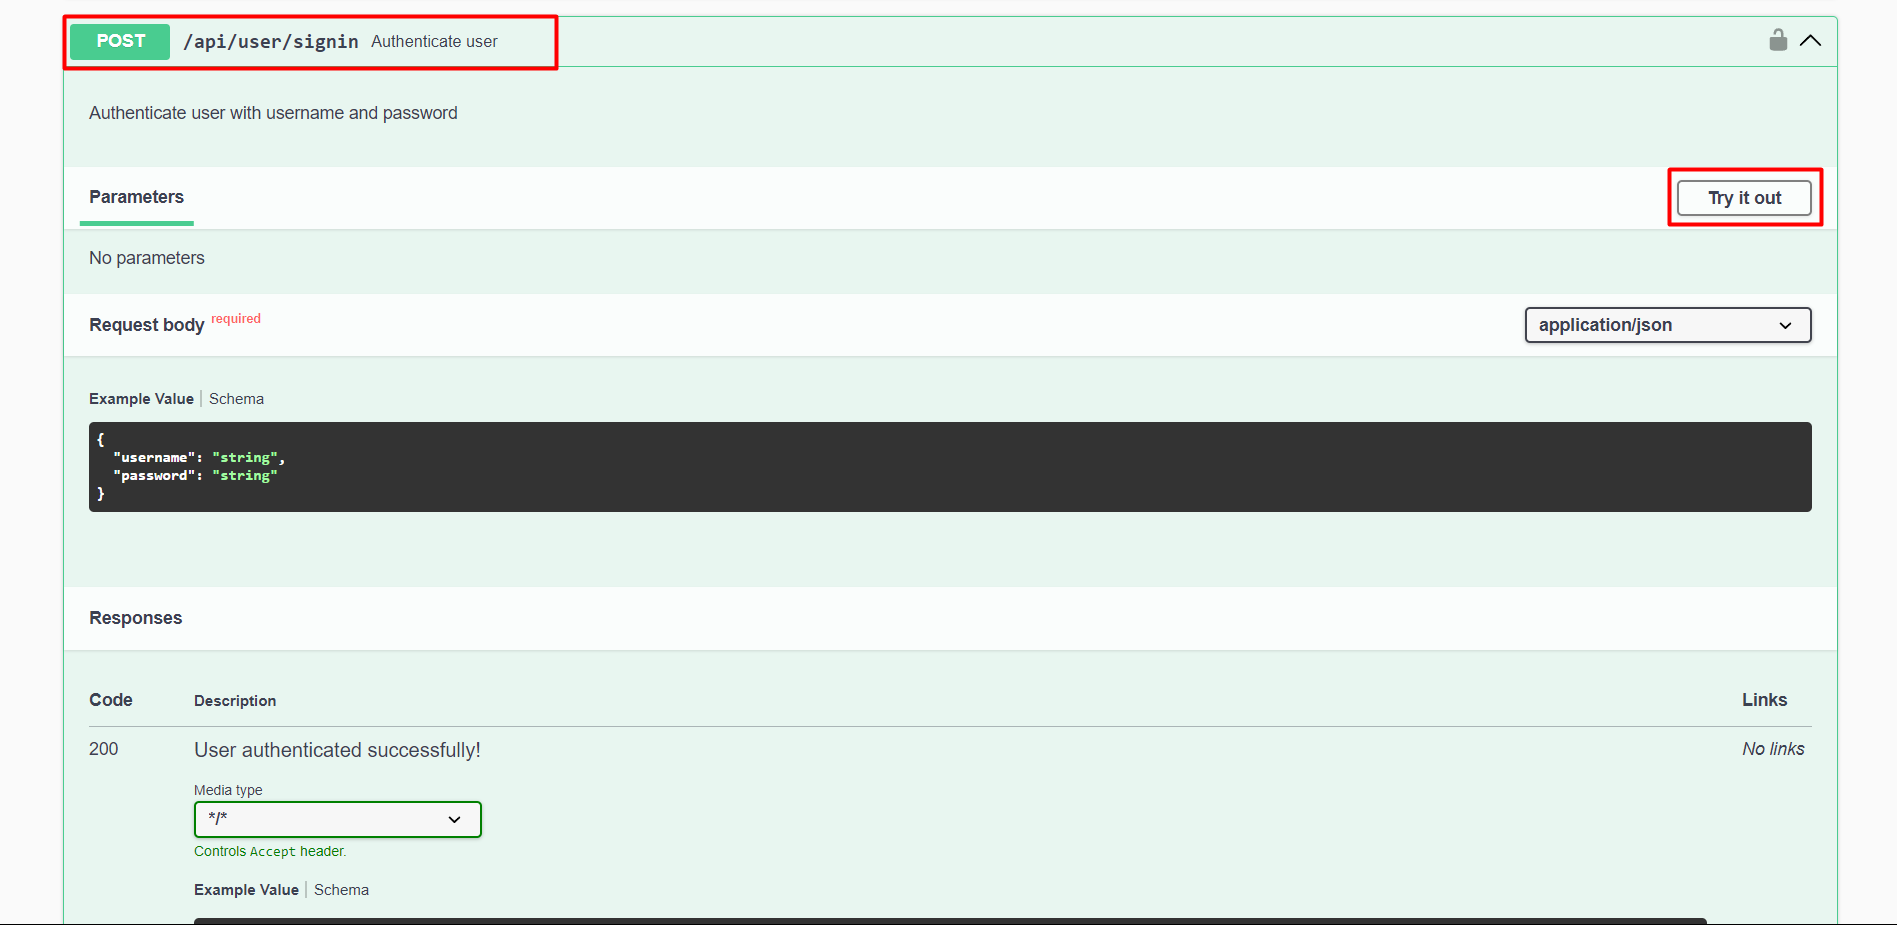
After successfully creating the Record, we can access User Service through the Swagger interface with DNS user-service-shopnow.tranvix.click/swagger-ui/index.html.
Proceed to create a new User and login using the Swagger interface.
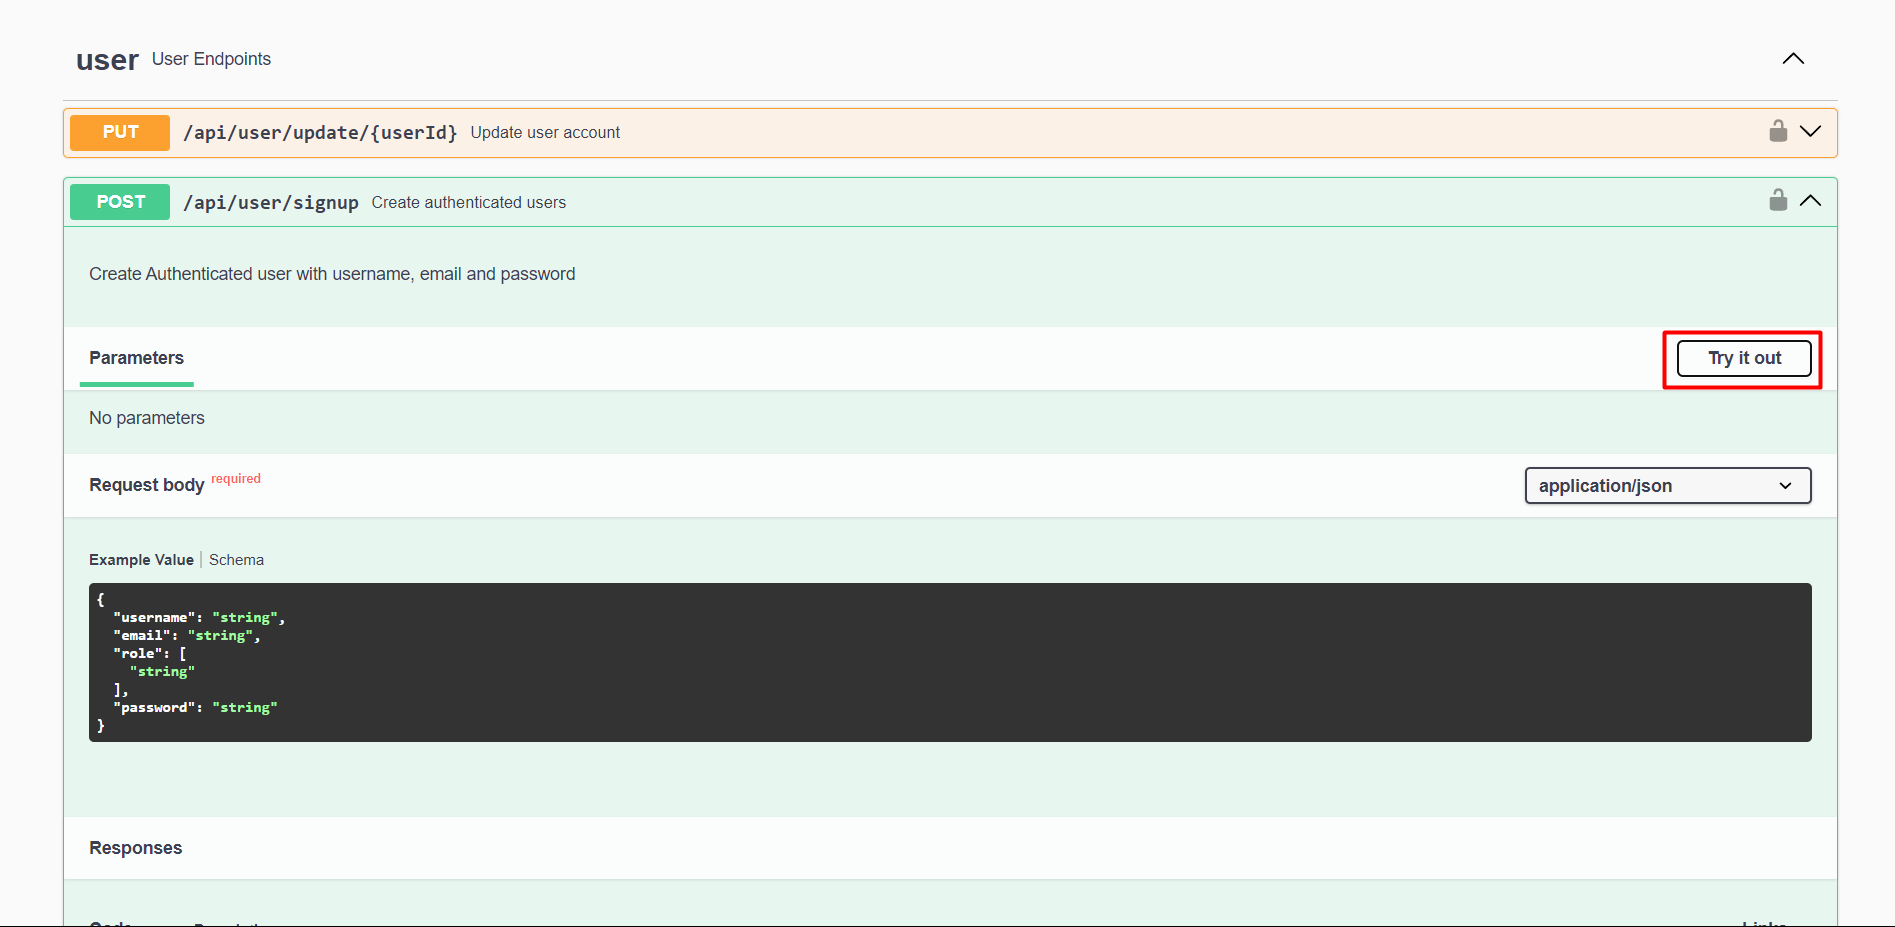
Enter the new User information and click Execute.
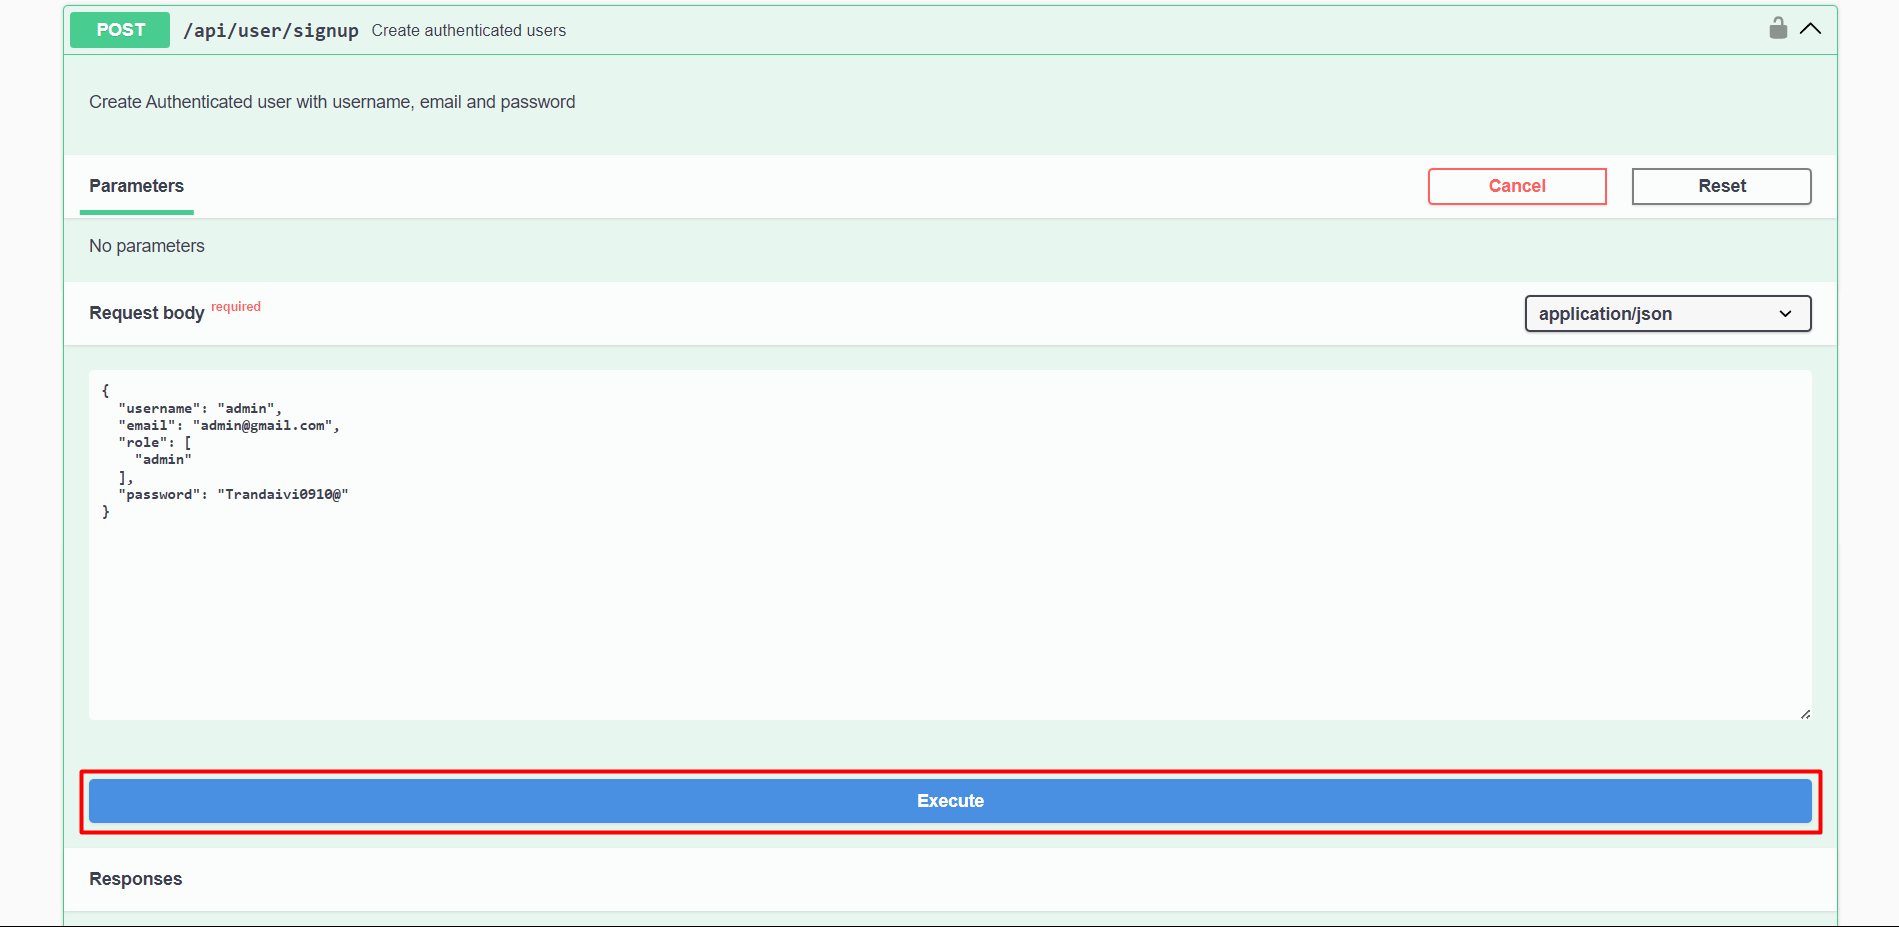
After successfully creating the User, we will have a response as follows.
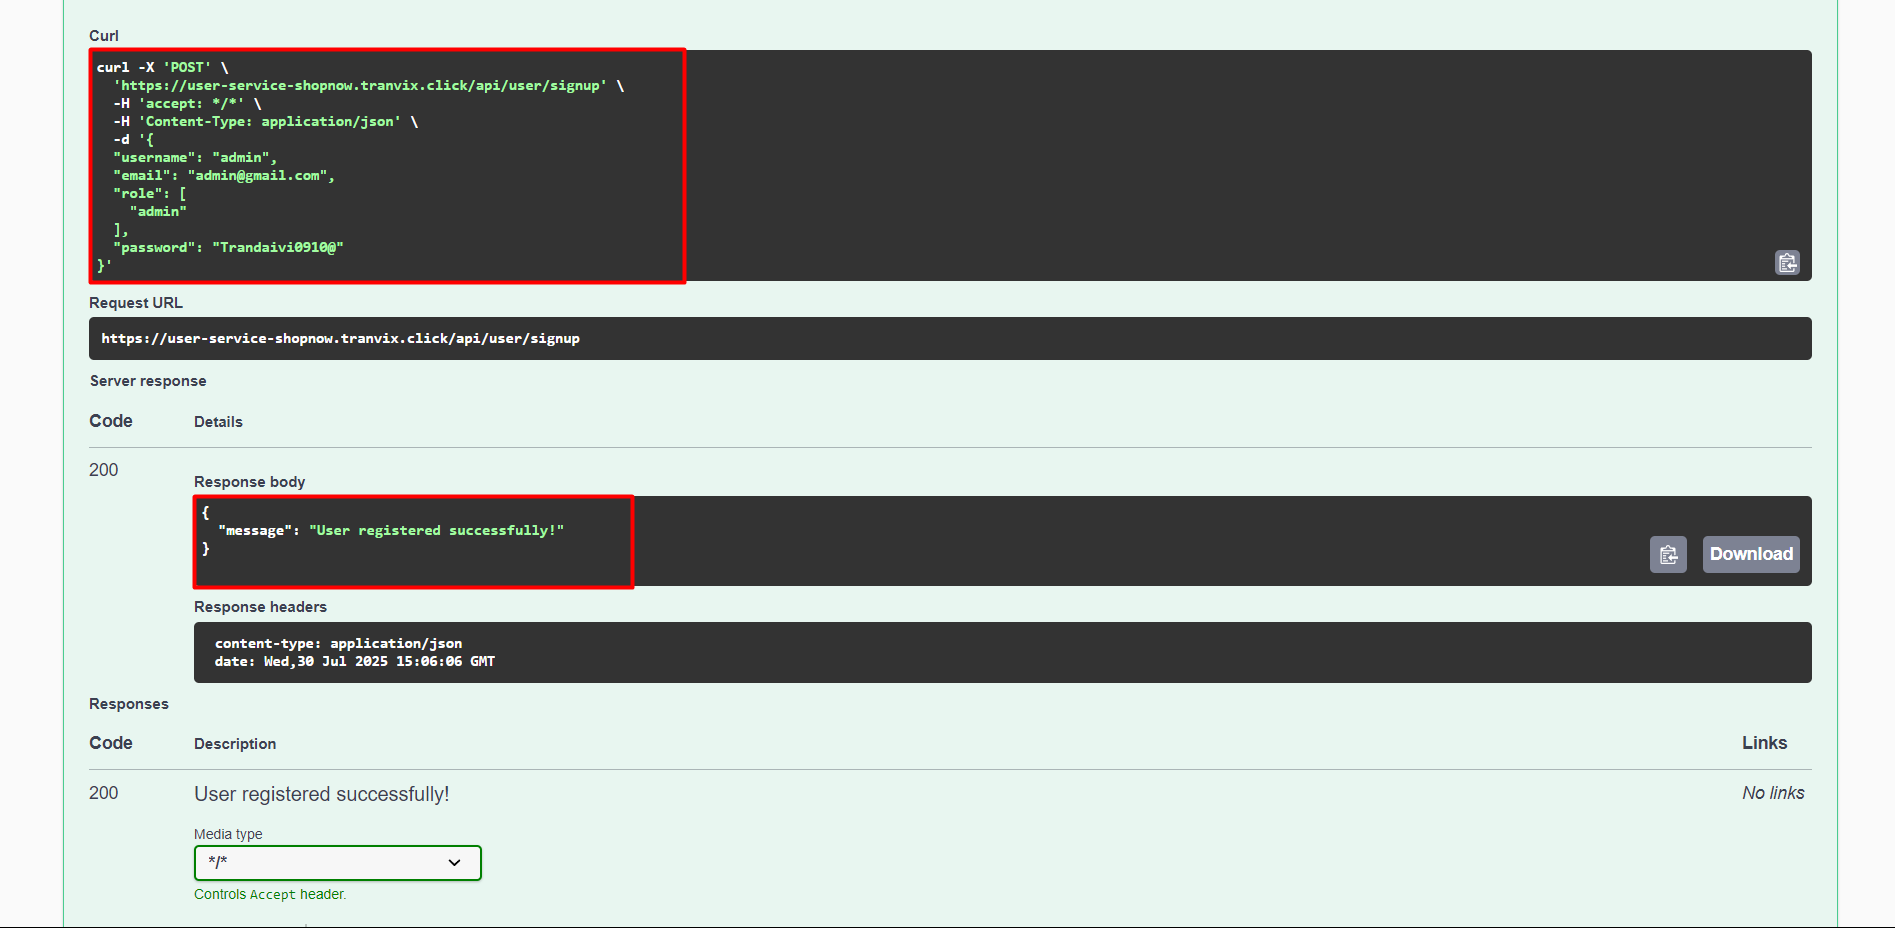
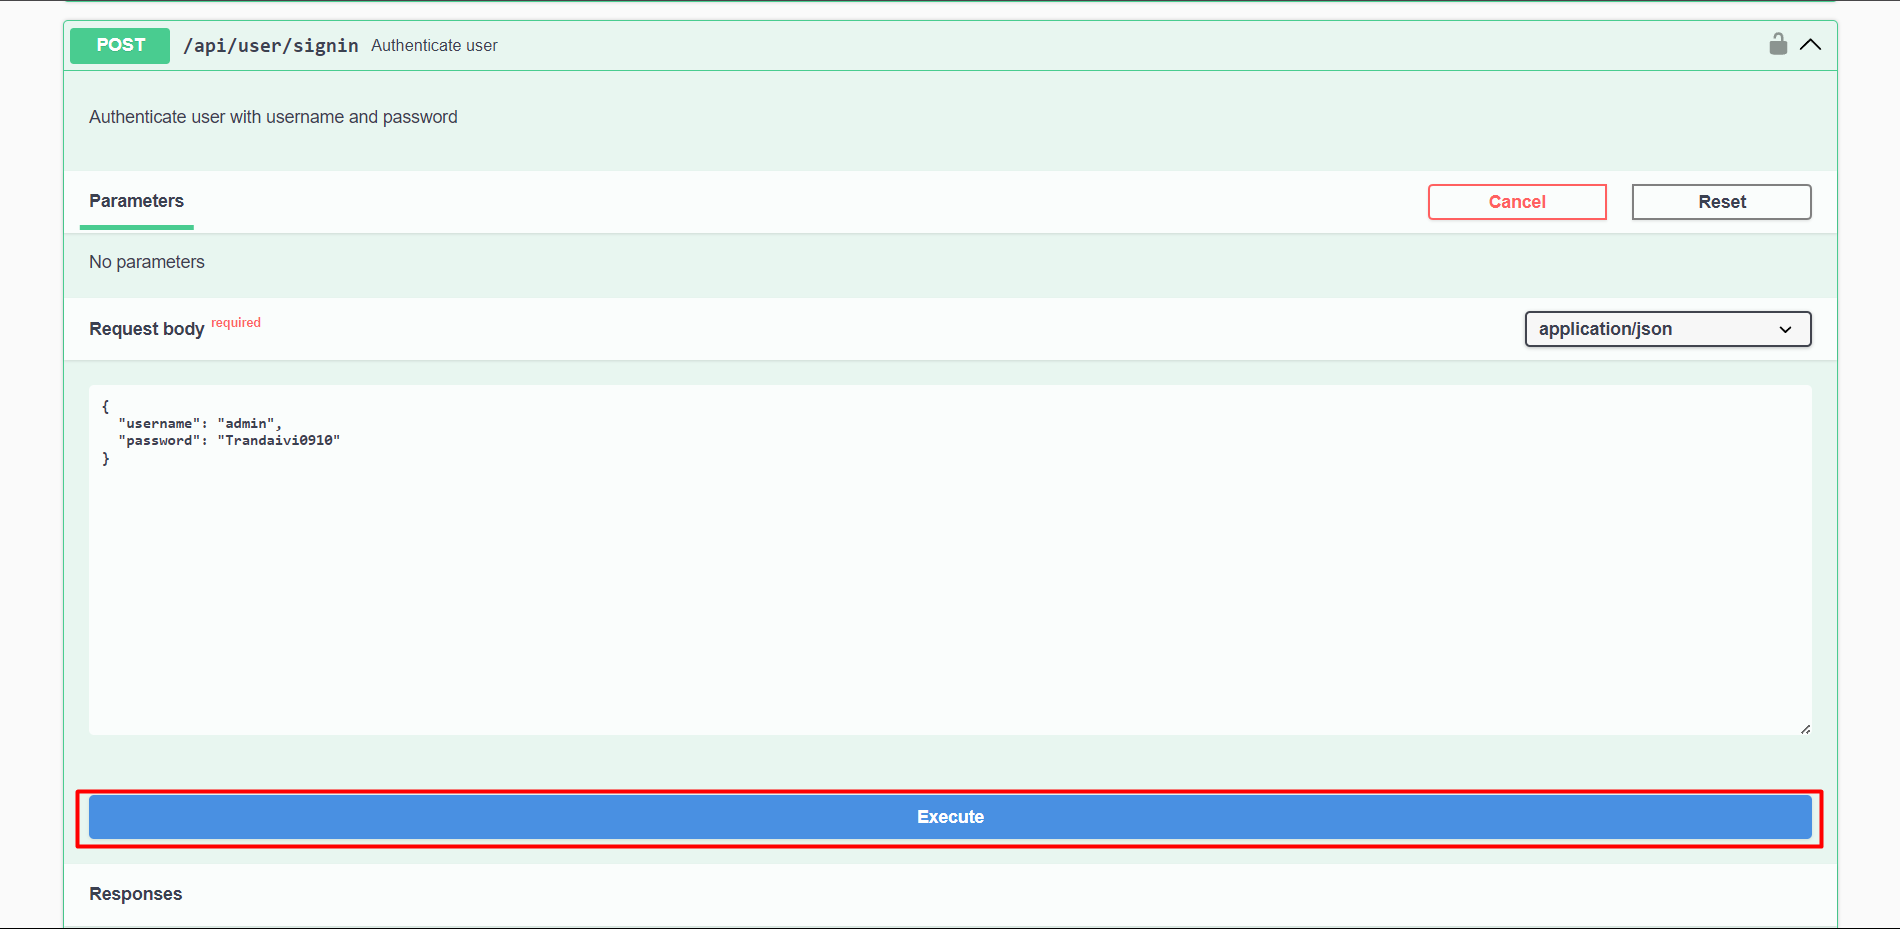
Thus, the User has been created successfully. Now we will login with the newly created User.
Enter the new User information and click Execute.
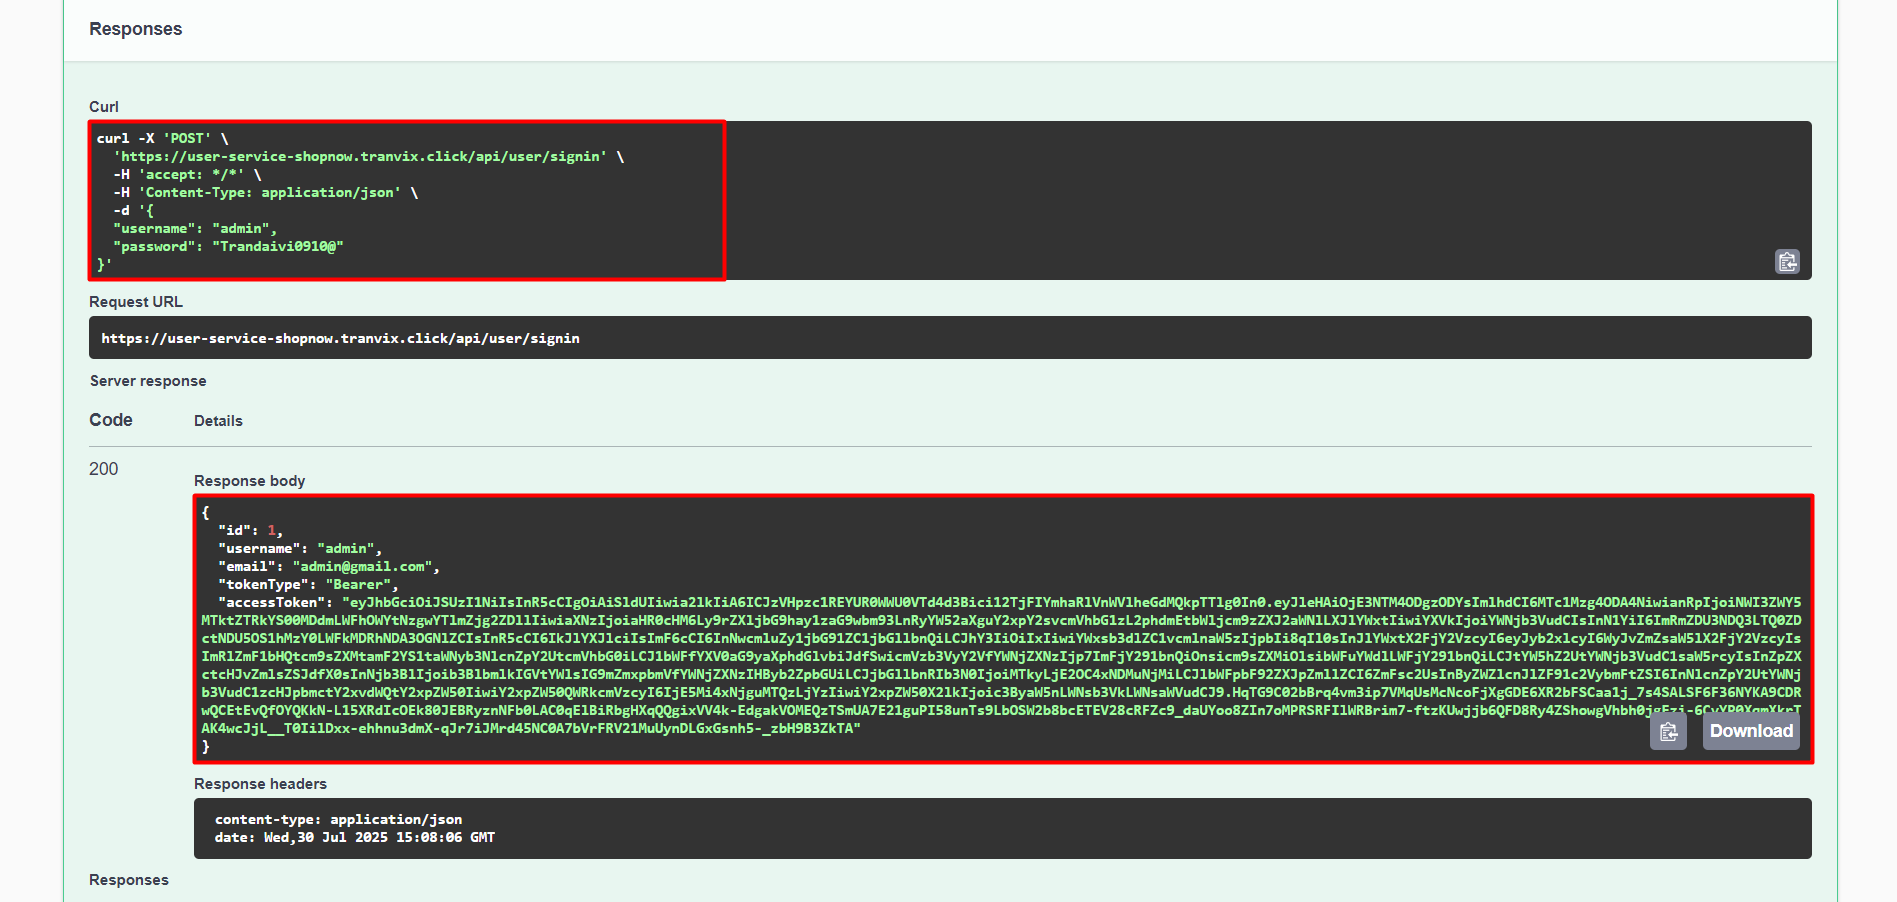
Thus, login was successful.
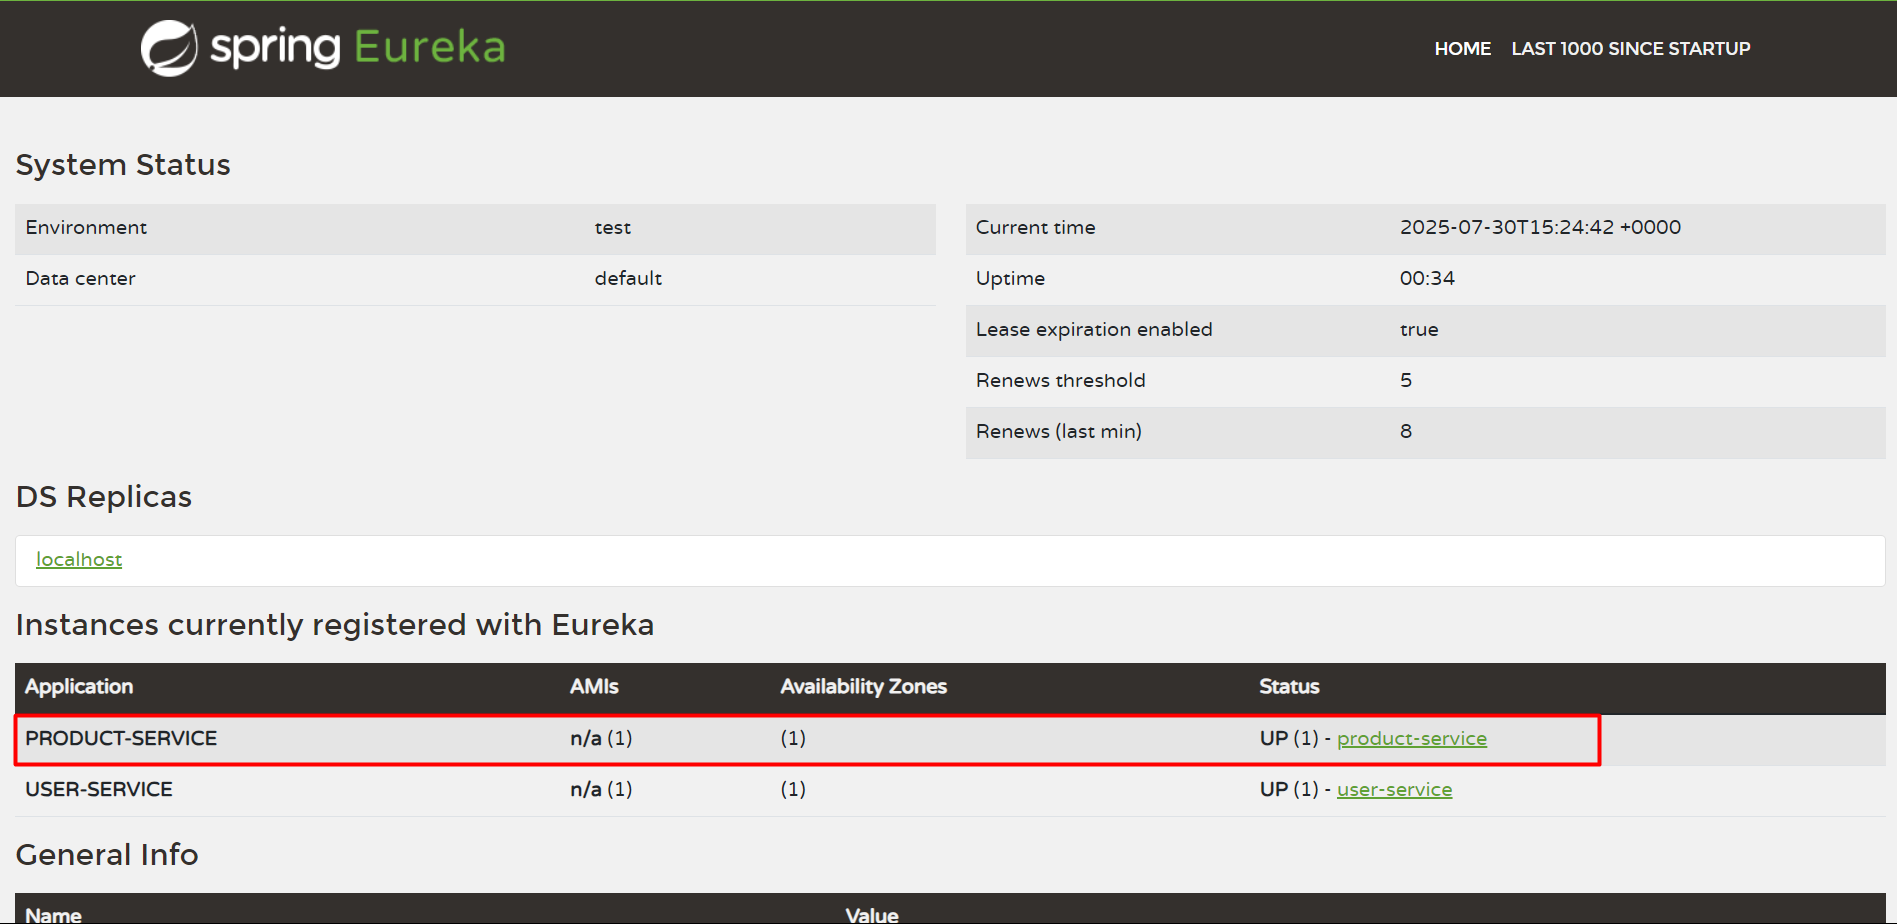
Check User Service in Discovery Server.
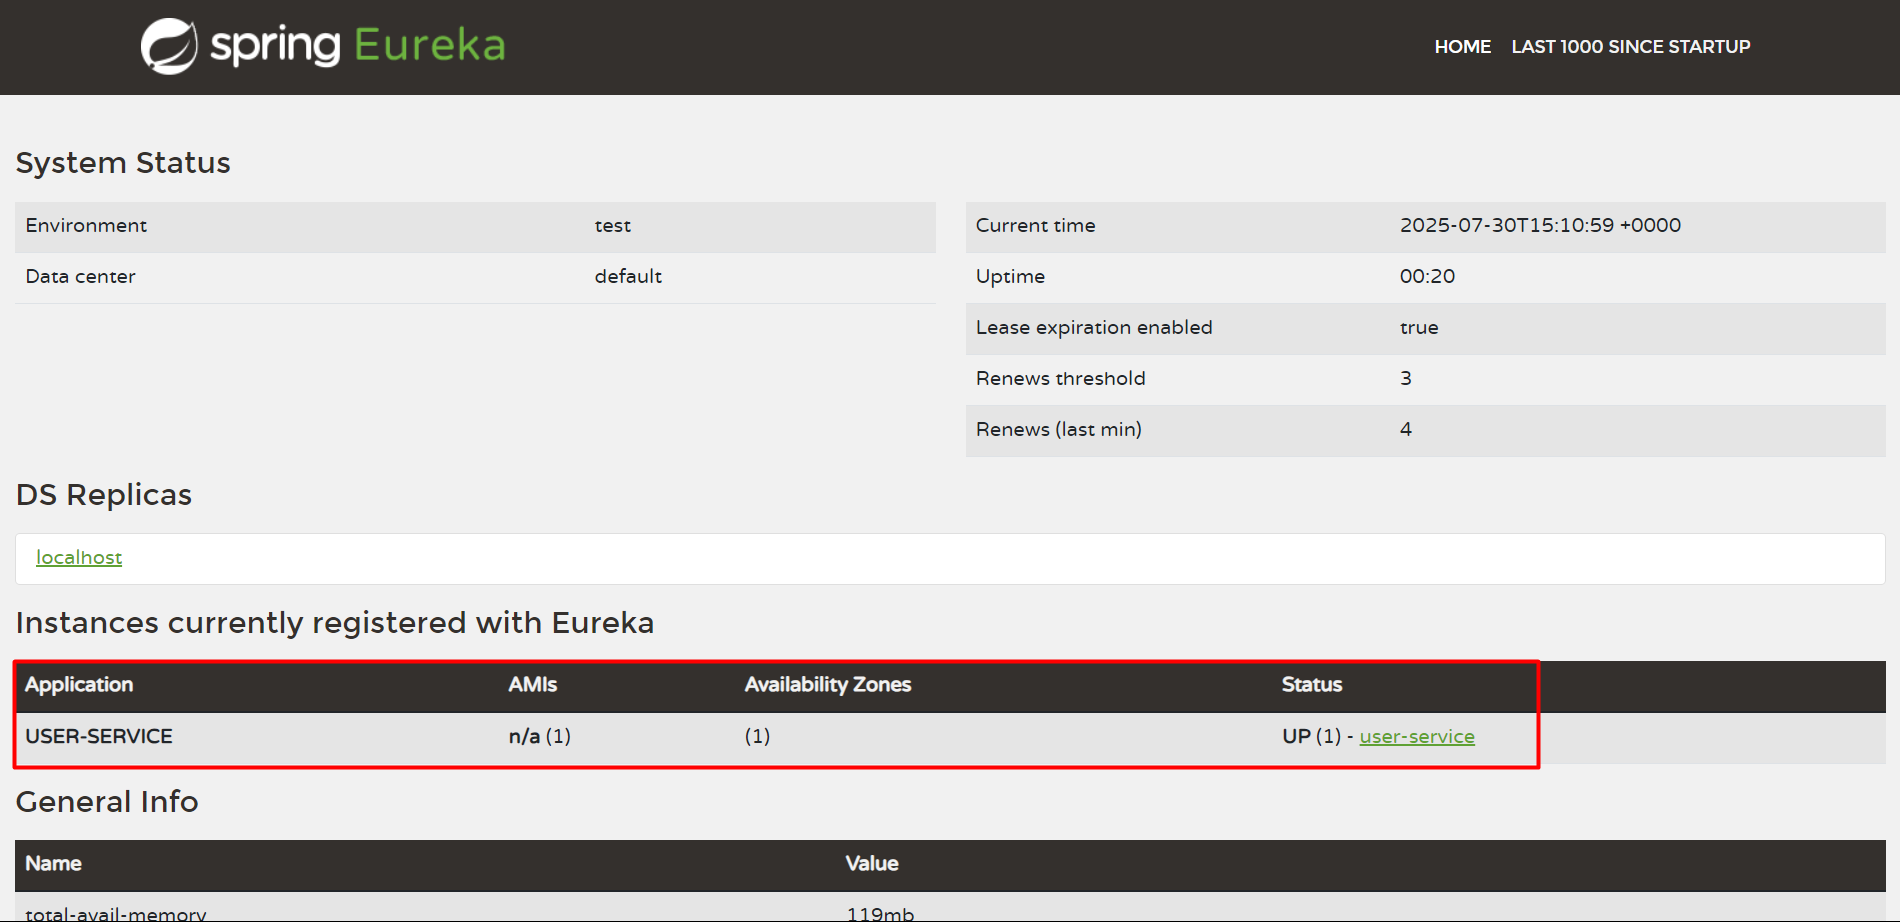
Thus, we have successfully deployed User Service.
Product Service
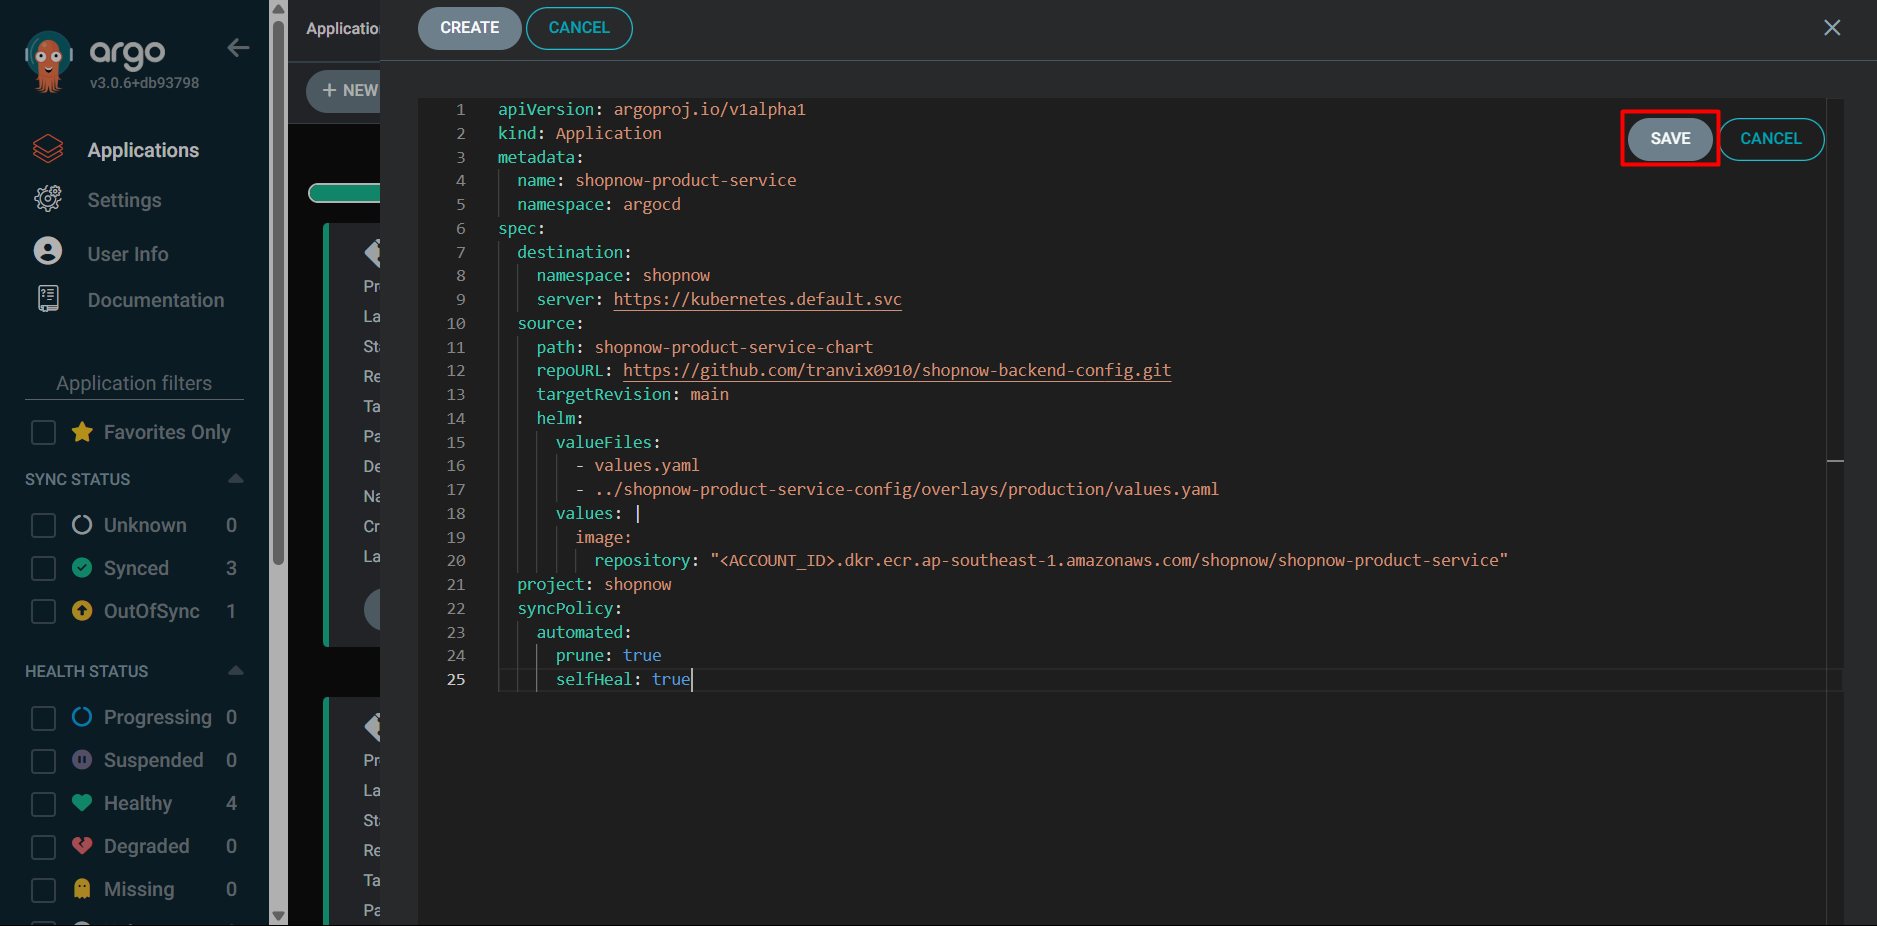
Product Service will be deployed similarly to User Service.
apiVersion: argoproj.io/v1alpha1
kind: Application
metadata:
  name: shopnow-product-service
  namespace: argocd
spec:
  destination:
    namespace: shopnow
    server: https://kubernetes.default.svc
  source:
    path: shopnow-product-service-chart
    repoURL: https://github.com/tranvix0910/shopnow-backend-config.git
    targetRevision: main
    helm:
      valueFiles:
        - values.yaml
        - ../shopnow-product-service-config/overlays/production/values.yaml
      values: |
        image:
          repository: "<ACCOUNT_ID>.dkr.ecr.ap-southeast-1.amazonaws.com/shopnow/shopnow-product-service"
  project: shopnow
  syncPolicy:
    automated:
      prune: true
      selfHeal: true
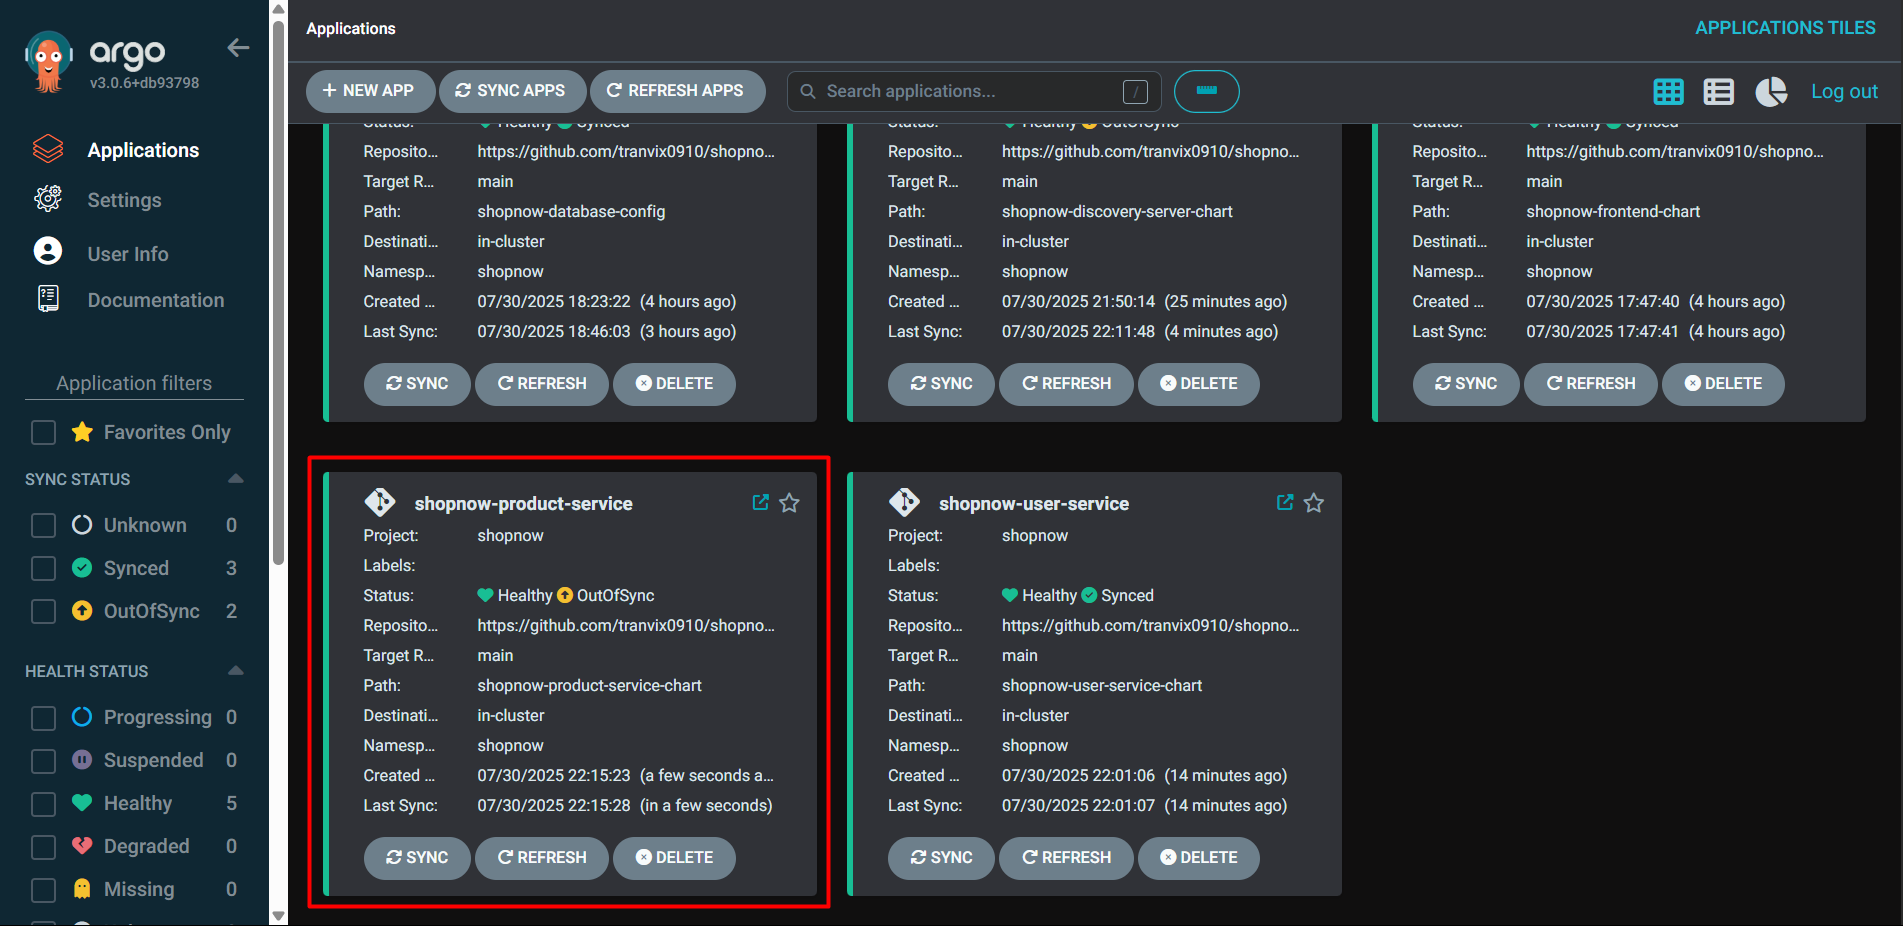

Thus, we have successfully deployed Product Service.
Proceed to Route 53 to configure DNS for Product Service.
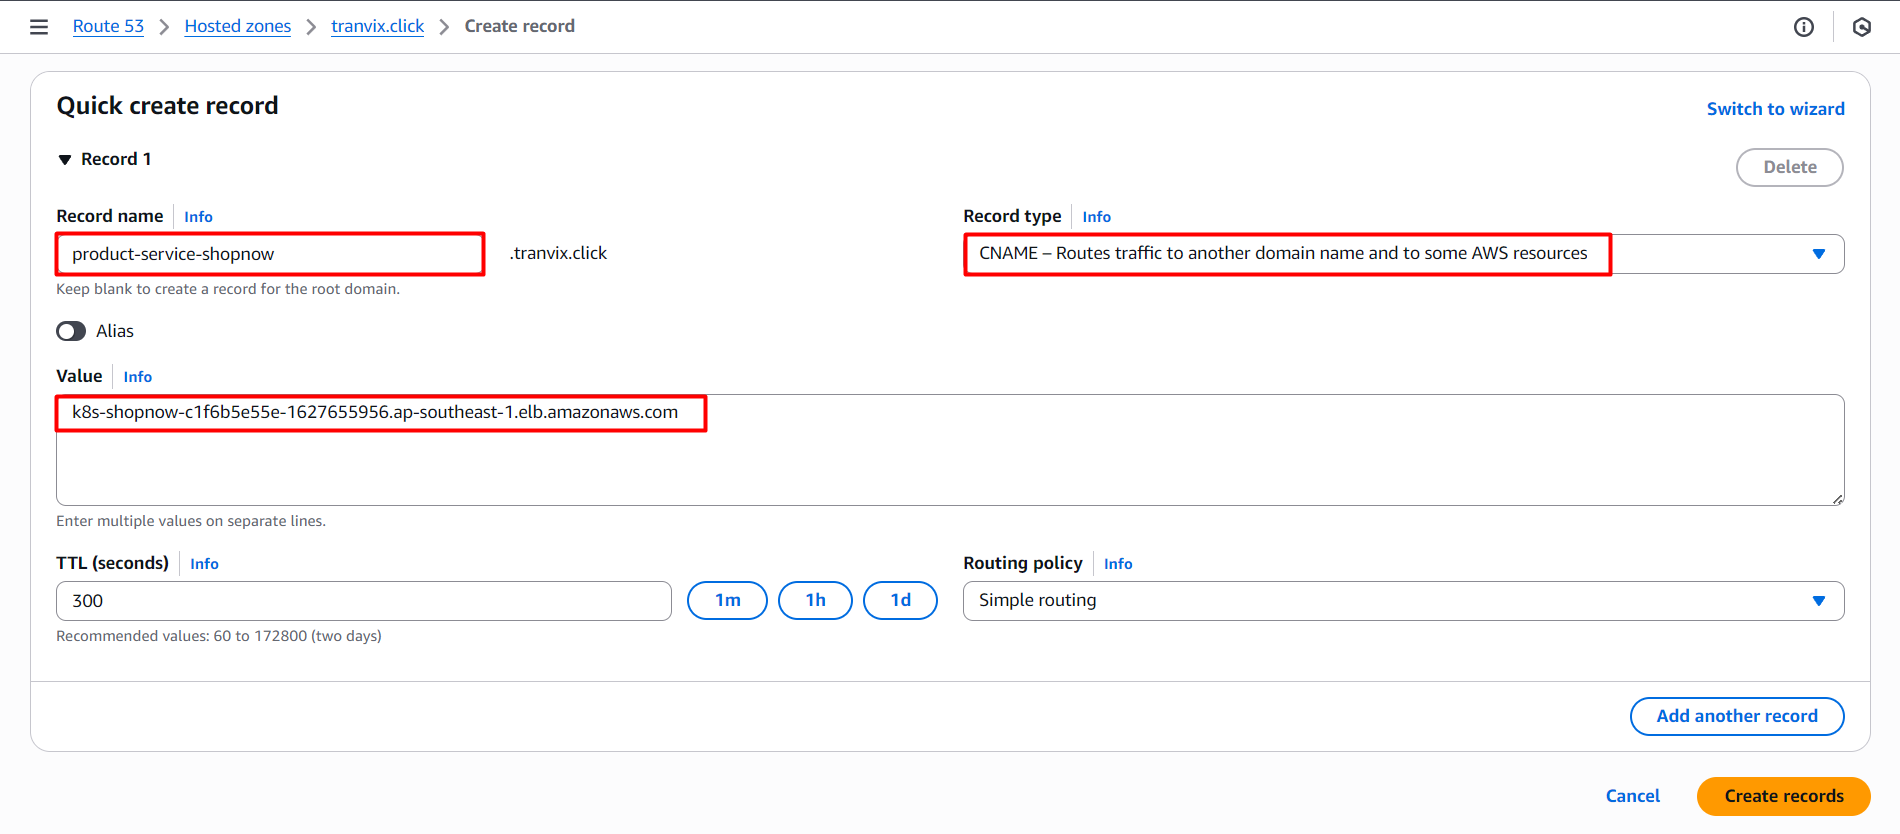
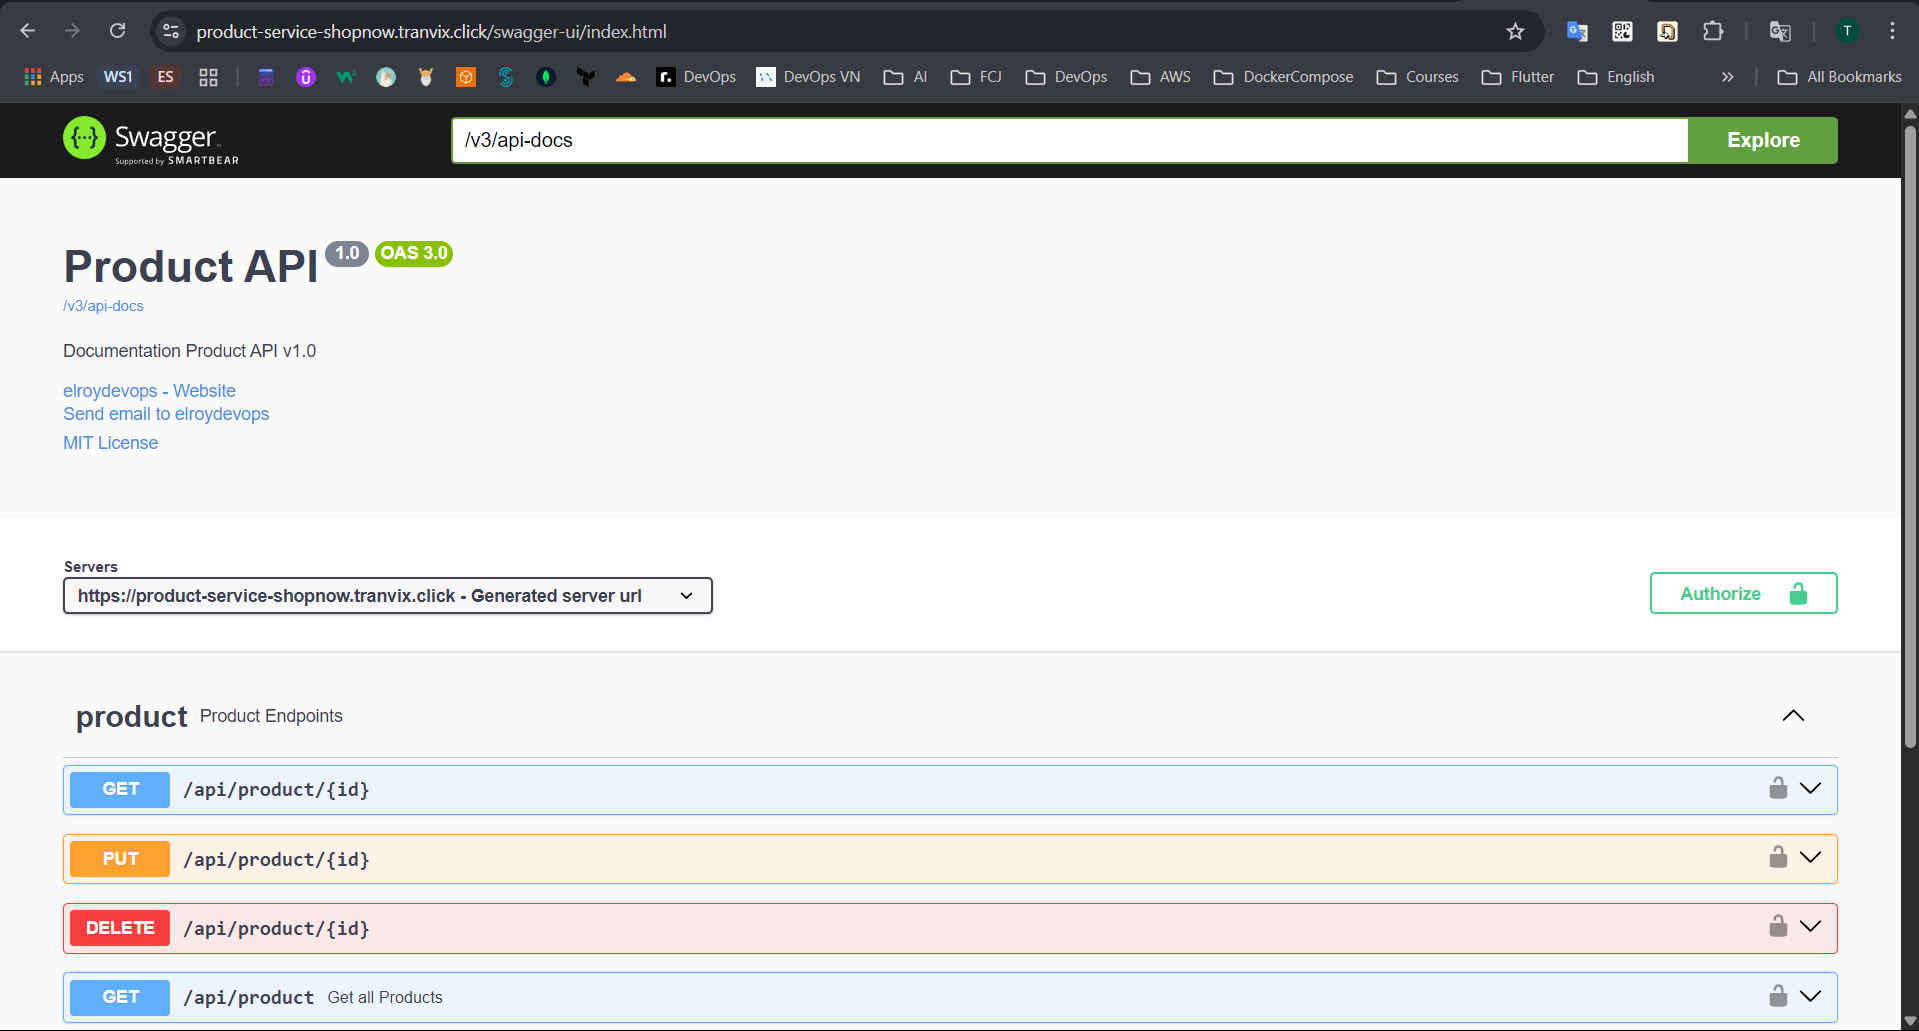
After successfully creating the Record, we can access Product Service through the Swagger interface with DNS product-service-shopnow.tranvix.click/swagger-ui/index.html.
Next, we will Import Products into PostgreSQL.
Check if the PostgreSQL Pod has been deployed successfully.
kubectl get pods -n shopnow

Access the Pod through the following command:
kubectl exec -it postgres-6fd889dc95-xrqk7 -n shopnow -- bash

Proceed to access the PostgreSQL Database with the postgres account and password admin as configured in the shopnow-postgresql.yaml file.
psql -h postgres -U postgres -d postgres

Additionally, we can access the PostgreSQL Database through another command.
su postgres
psql

Proceed to Import Products into PostgreSQL.
INSERT INTO public.product (id,category,description,"name",price) VALUES
	 (3,'Thời trang nữ','Màu sắc thực của mặt hàng có thể hơi khác so với hình ảnh hiển thị trên trang web','Áo len ren màu hồng cardigan nữ',200000),
	 (2,'Điện thoại','IPhone 15 Pro Max là sản phẩm cao cấp nhất trong bộ sưu tập 15 series loại xin đó','Điện thoại Apple iPhone 15 Pro Max 256GB',29690000),
	 (4,'Giày dép nữ','một phiên bản mới của mẫu giày huyền thoại Air Jordan 1, mang thiết kế sắc nét và đầy tính biểu tượng. Được lấy cảm hứng từ những màu sắc của đội bóng rổ','Nike Air Jordan 1 Mid Chicago Toe Like Auth',1190000),
	 (5,'Điện thoại','MacBook Pro 14 inch M4 2024 là một trong những mẫu laptop cao cấp của Apple, được trang bị các tính năng mạnh mẽ và cải tiến so với các phiên bản trước. Dưới đây là một số điểm nổi bật của nó','MacBook Pro 14 inch M4 2024',40000000),
	 (6,'Sắc đẹp','Emmié Soothing & Hydrating Derma Cleansing chính là Gel rửa mặt B5 chuyên dụng tại SPA, hoàn hảo cho da siêu nhạy cảm và sau điều trị.','Gel Rửa Mặt Emmié Soothing',280000),
	 (7,'Thời trang nữ','Chiếc quần legging với thiết kế cao cấp, cách điệu cạp chéo, nữ tính. Được may trên nền 3 chất liệu: cotton, polyester và rayon với tỉ lệ hoàn hảo giúp người mặc thoải mái vận động tập thể thao hay đi chơi.','Quần Tập Gym Nữ Cạp Chéo',299000),
	 (8,'Thời trang','Đế dép thường được thiết kế chống trượt, giúp di chuyển an toàn trên sàn nhà','Dép đi trong nhà siêu xinh nam nữ',387000),
	 (9,'Thiết bị điện tử','Công nghệ UltraMix hòa tan bột giặt trước khi giặt nâng cao hiệu quả giặt Công nghệ AutoDose tự động phân bổ chính xác lượng nước giặt, nước xả','Máy giặt Electrolux Inverter 11 kg',15690000);
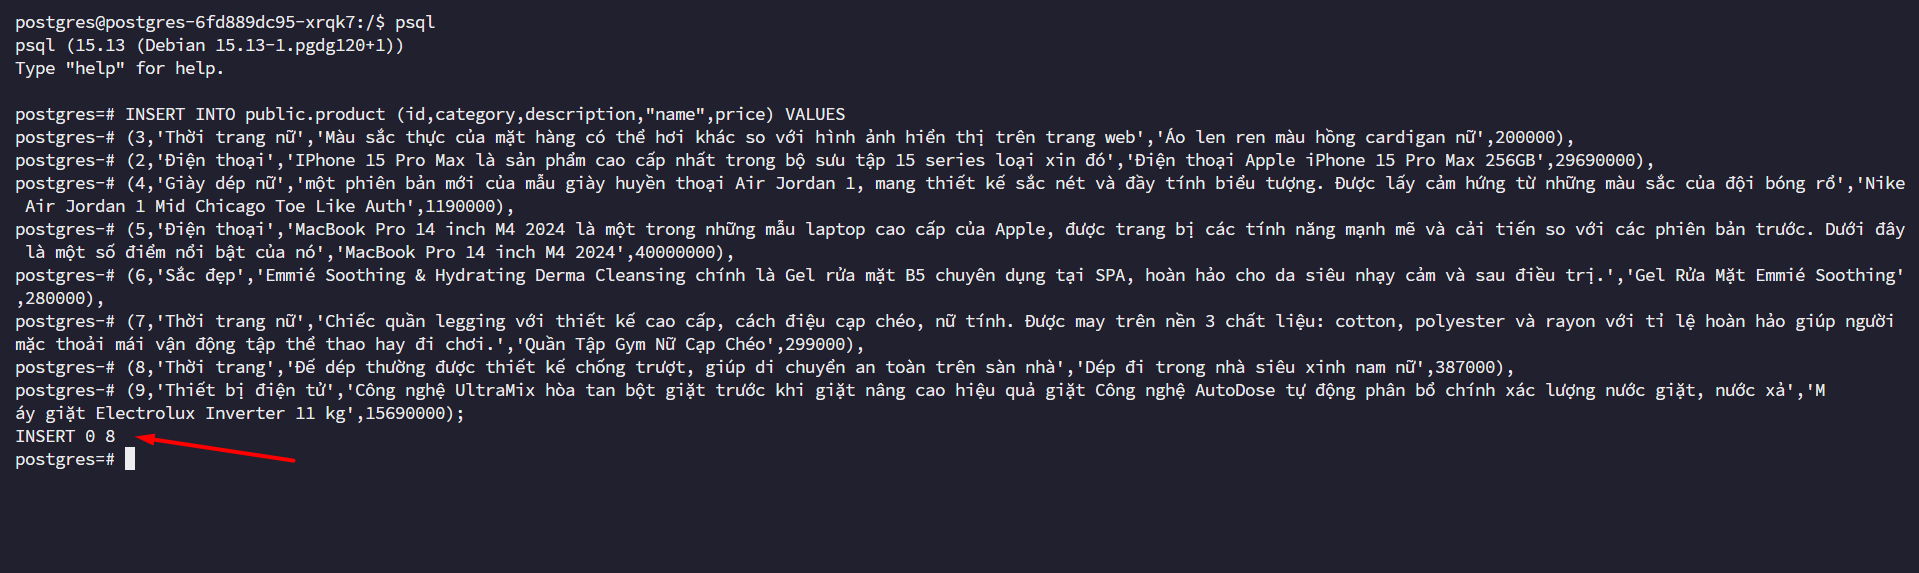
Thus, we have successfully imported Products.
Check the Product list.
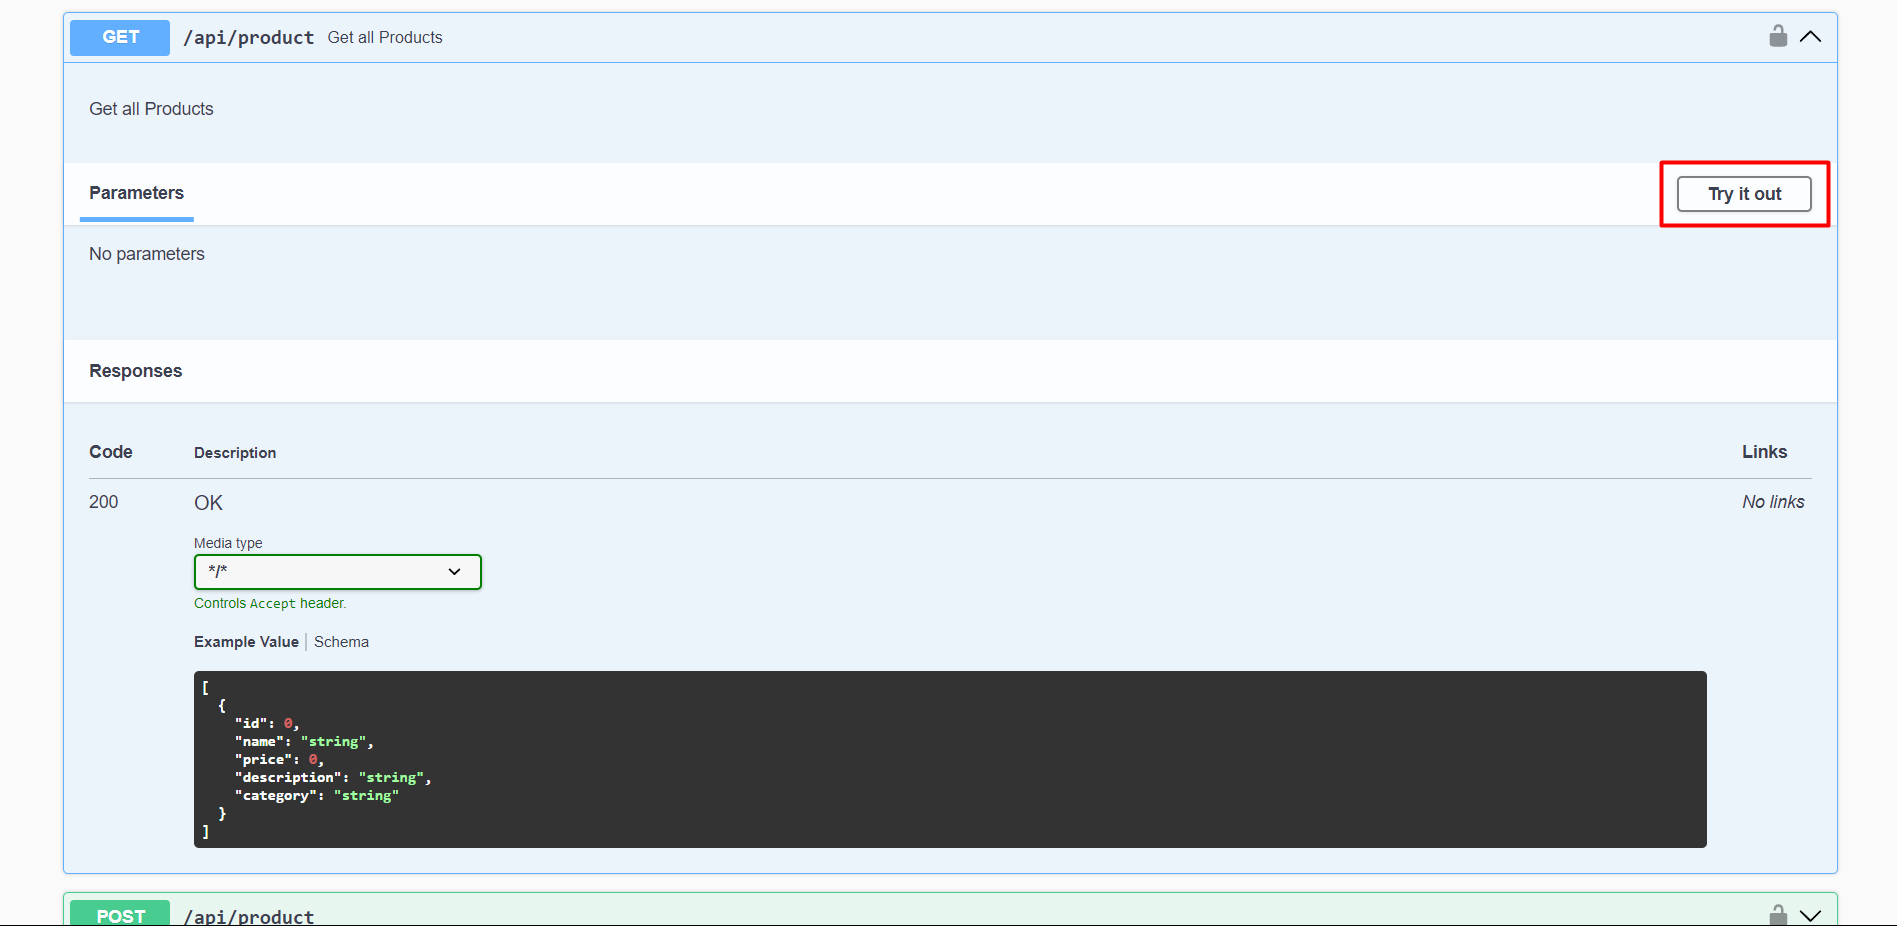
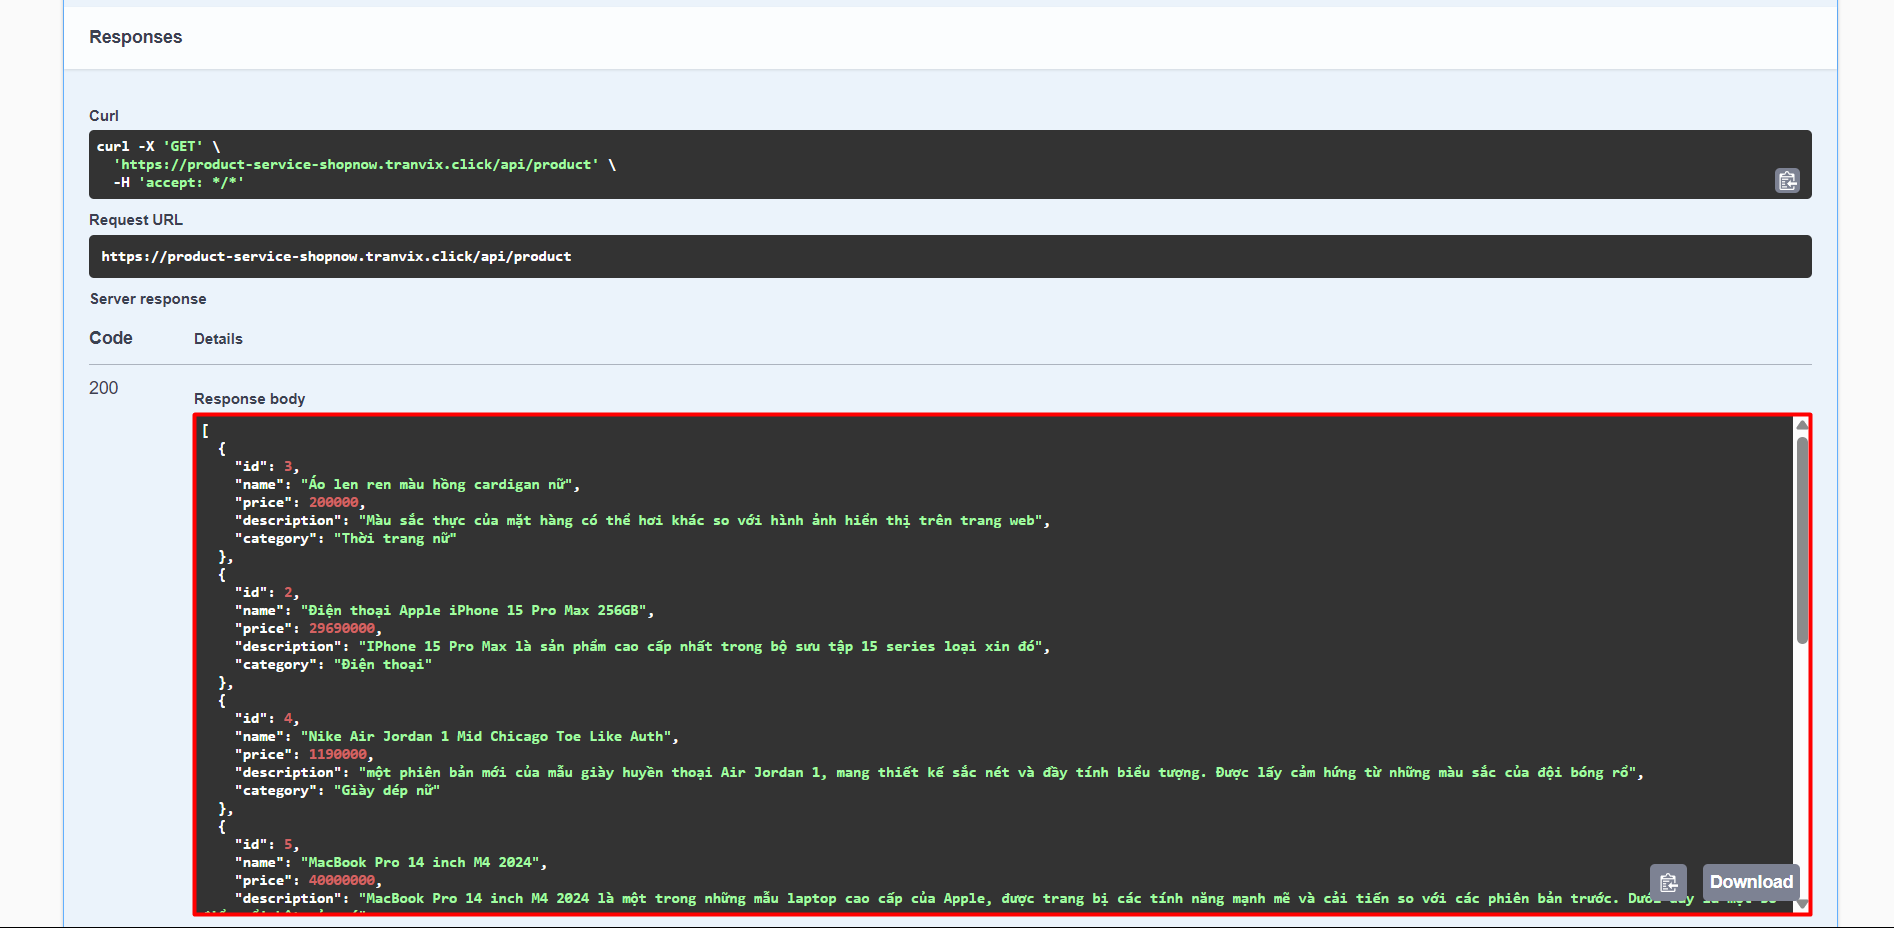
The product list is now available.
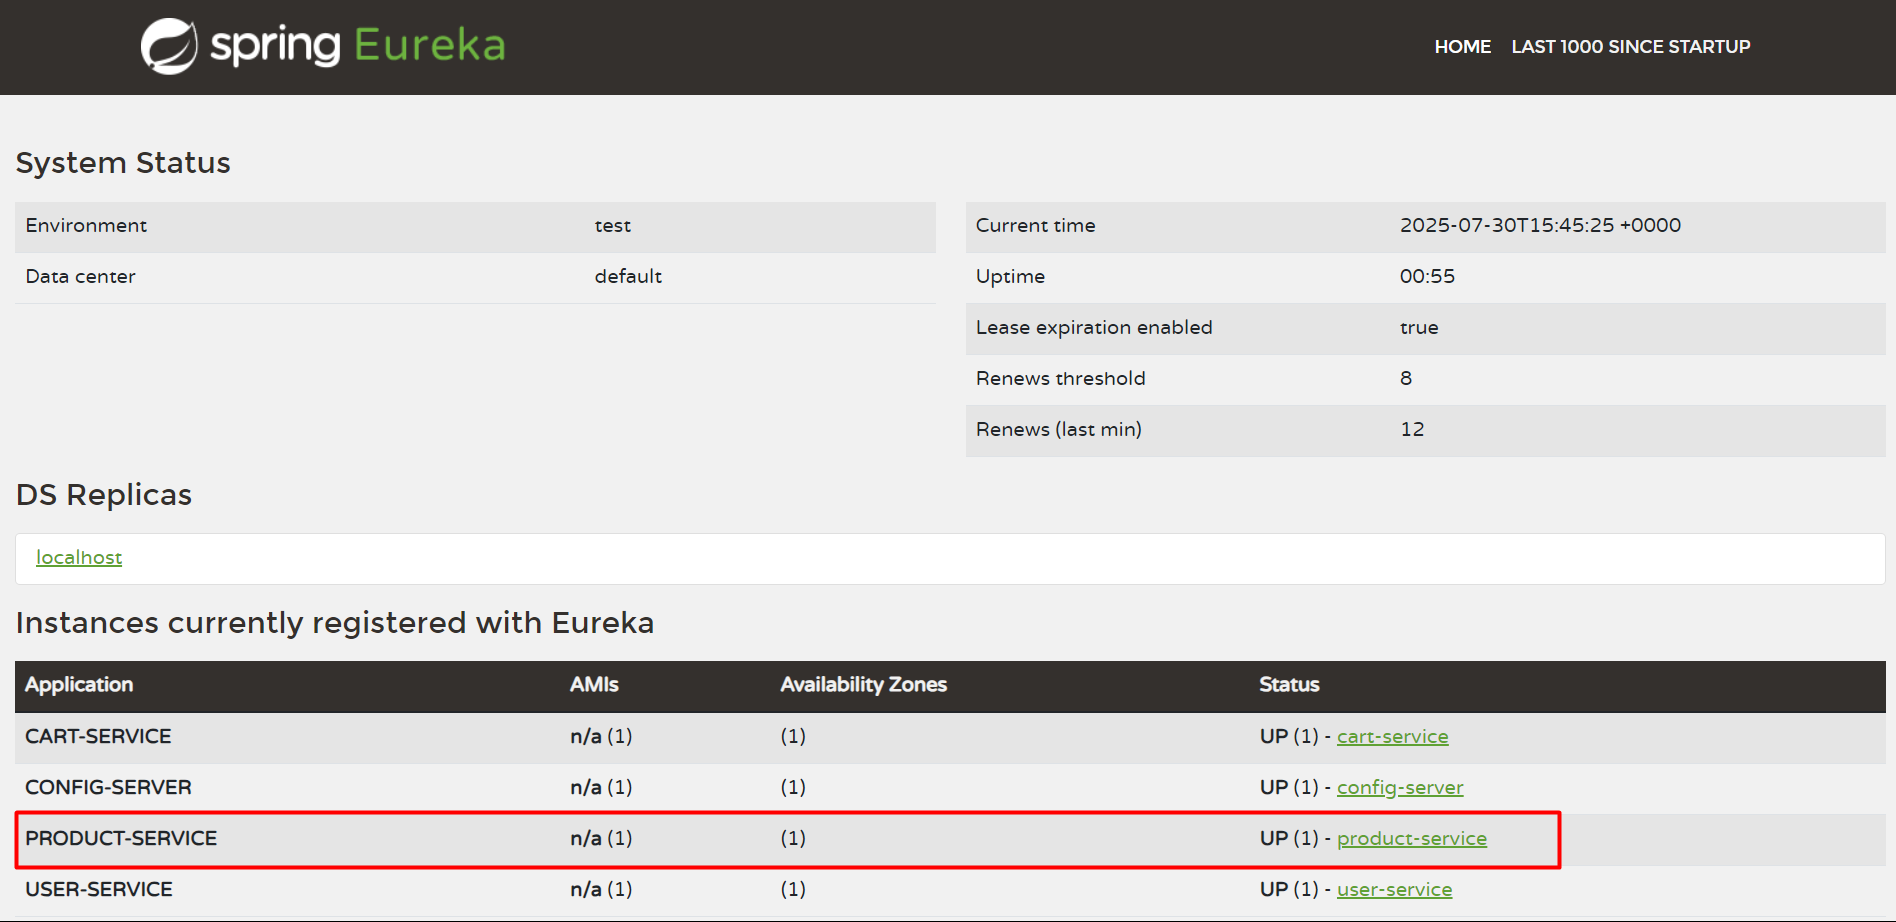
Check Product Service in Discovery Server.
Thus, we have successfully deployed Product Service.
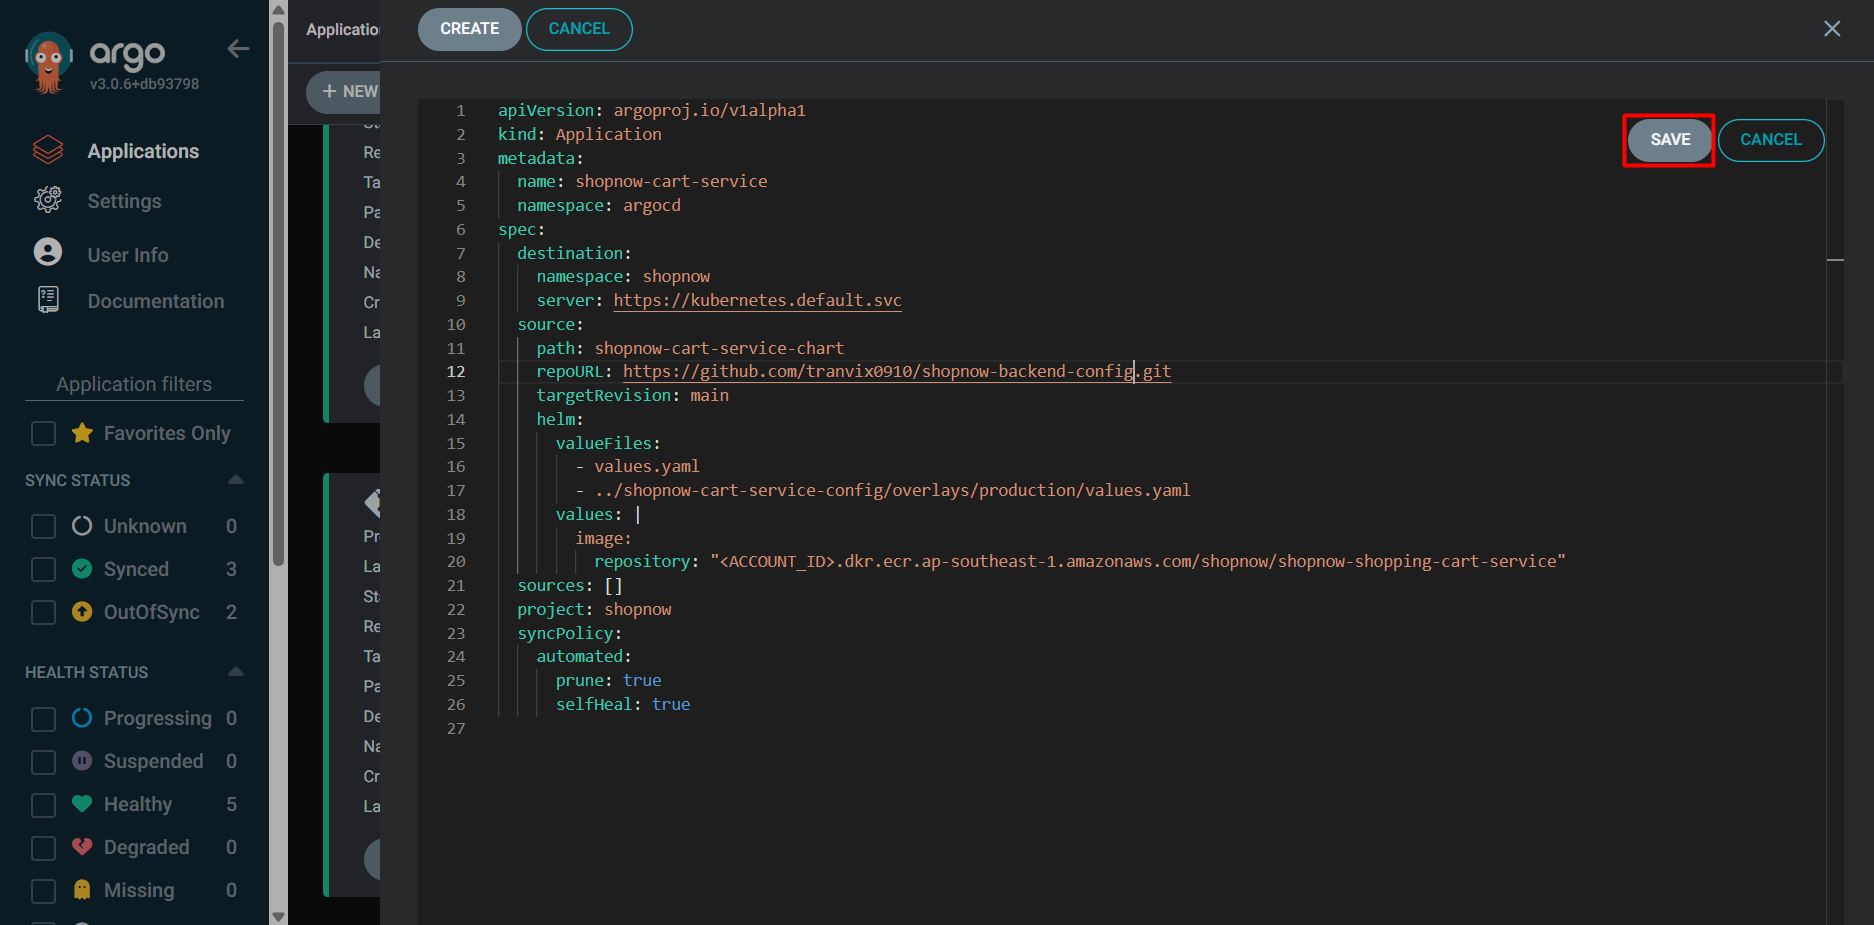
Cart Service
Cart Service will be deployed similarly.
apiVersion: argoproj.io/v1alpha1
kind: Application
metadata:
  name: shopnow-cart-service
  namespace: argocd
spec:
  destination:
    namespace: shopnow
    server: https://kubernetes.default.svc
  source:
    path: shopnow-cart-service-chart
    repoURL: https://github.com/tranvix0910/shopnow-backend-config.git
    targetRevision: main
    helm:
      valueFiles:
        - values.yaml
        - ../shopnow-cart-service-config/overlays/production/values.yaml
      values: |
        image:
          repository: "<ACCOUNT_ID>.dkr.ecr.ap-southeast-1.amazonaws.com/shopnow/shopnow-shopping-cart-service"
  project: shopnow
  syncPolicy:
    automated:
      prune: true
      selfHeal: true
Create DNS for Cart Service.
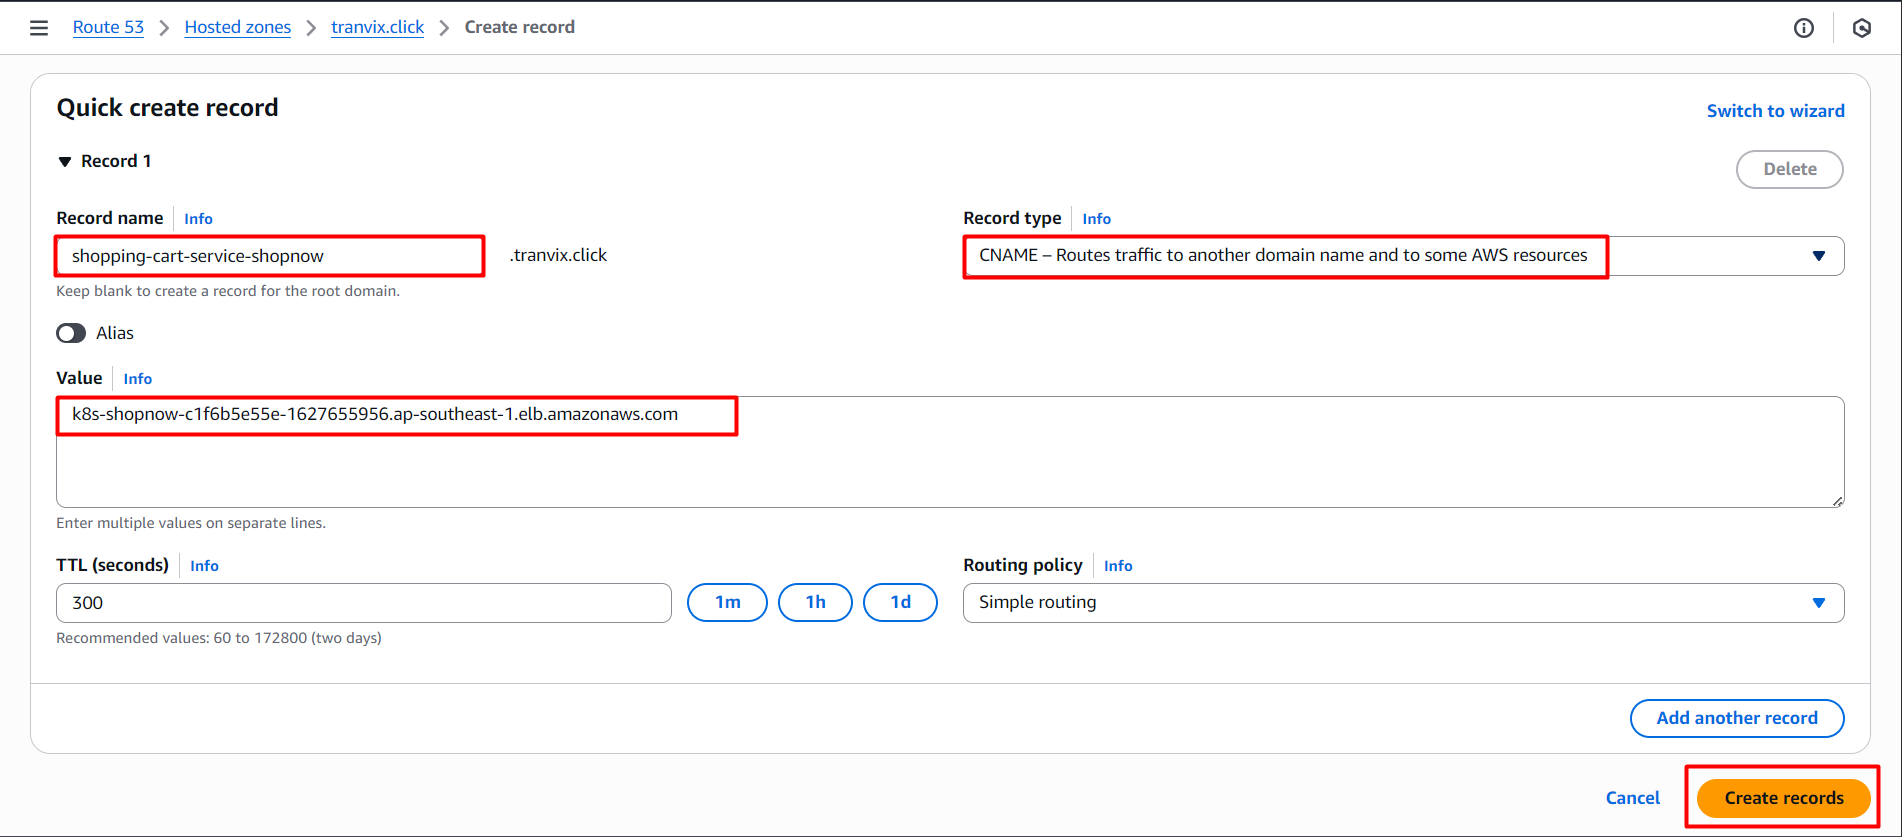
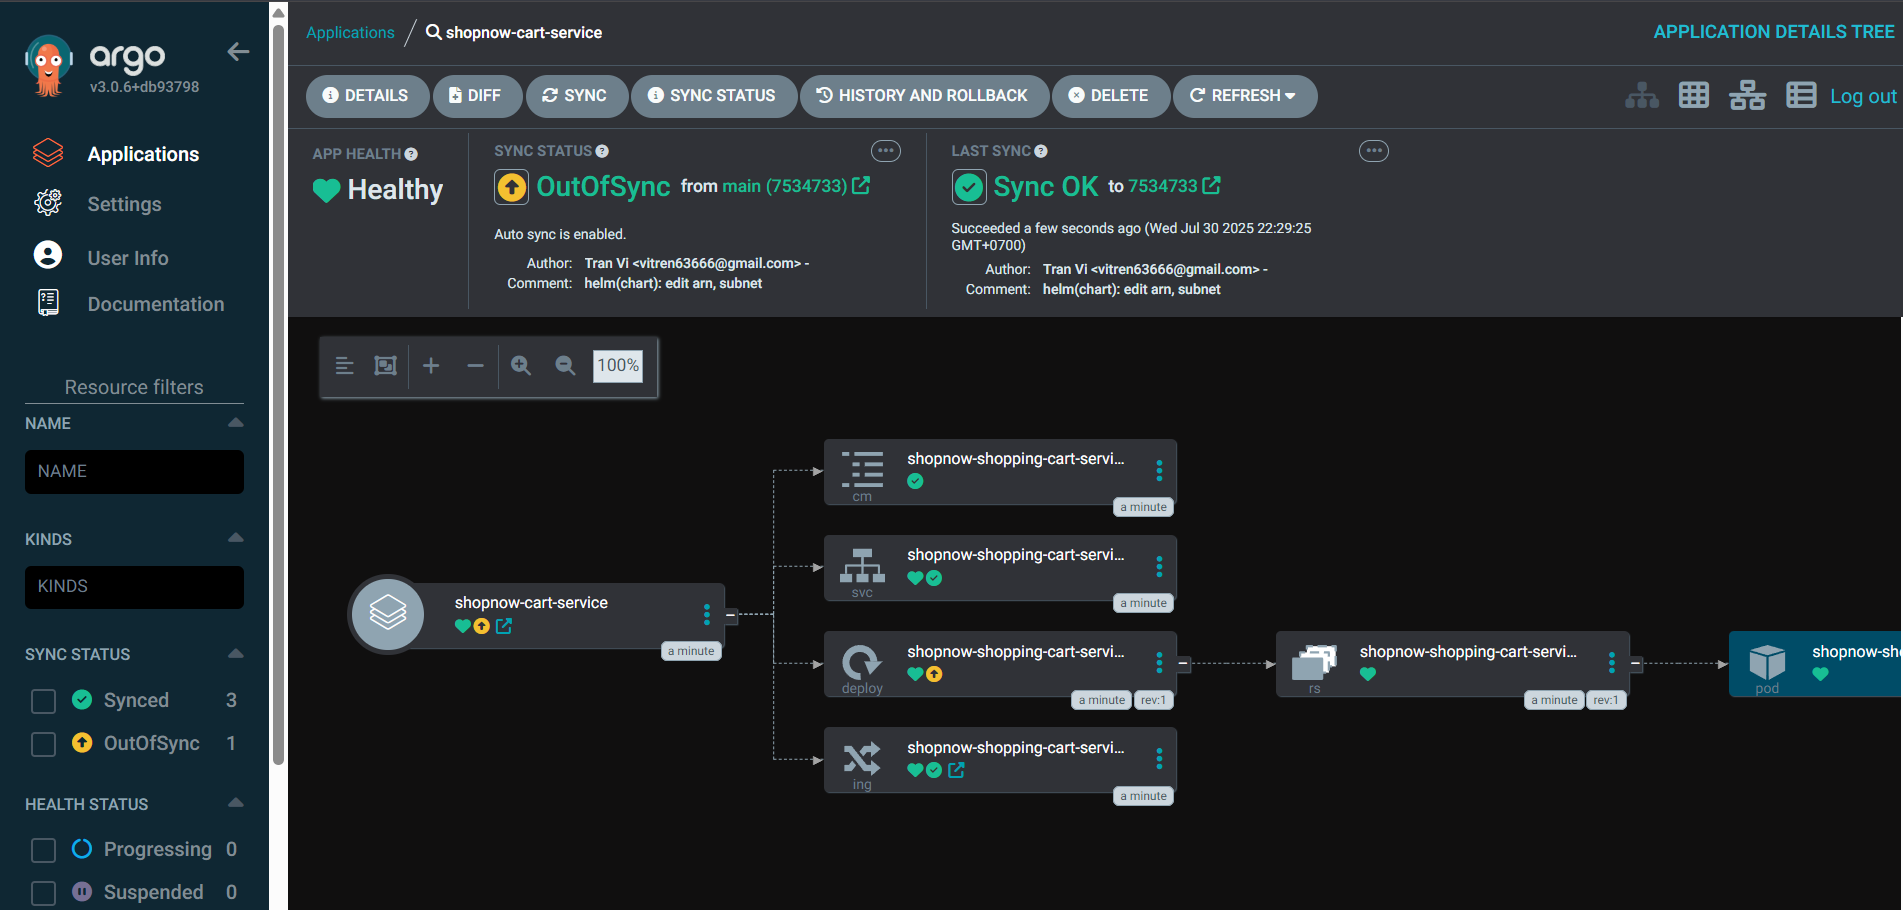
After successfully creating the Record, we can access Cart Service through the Swagger interface with DNS shopping-cart-service-shopnow.tranvix.click/swagger-ui/index.html.

Check Cart Service in Discovery Server.
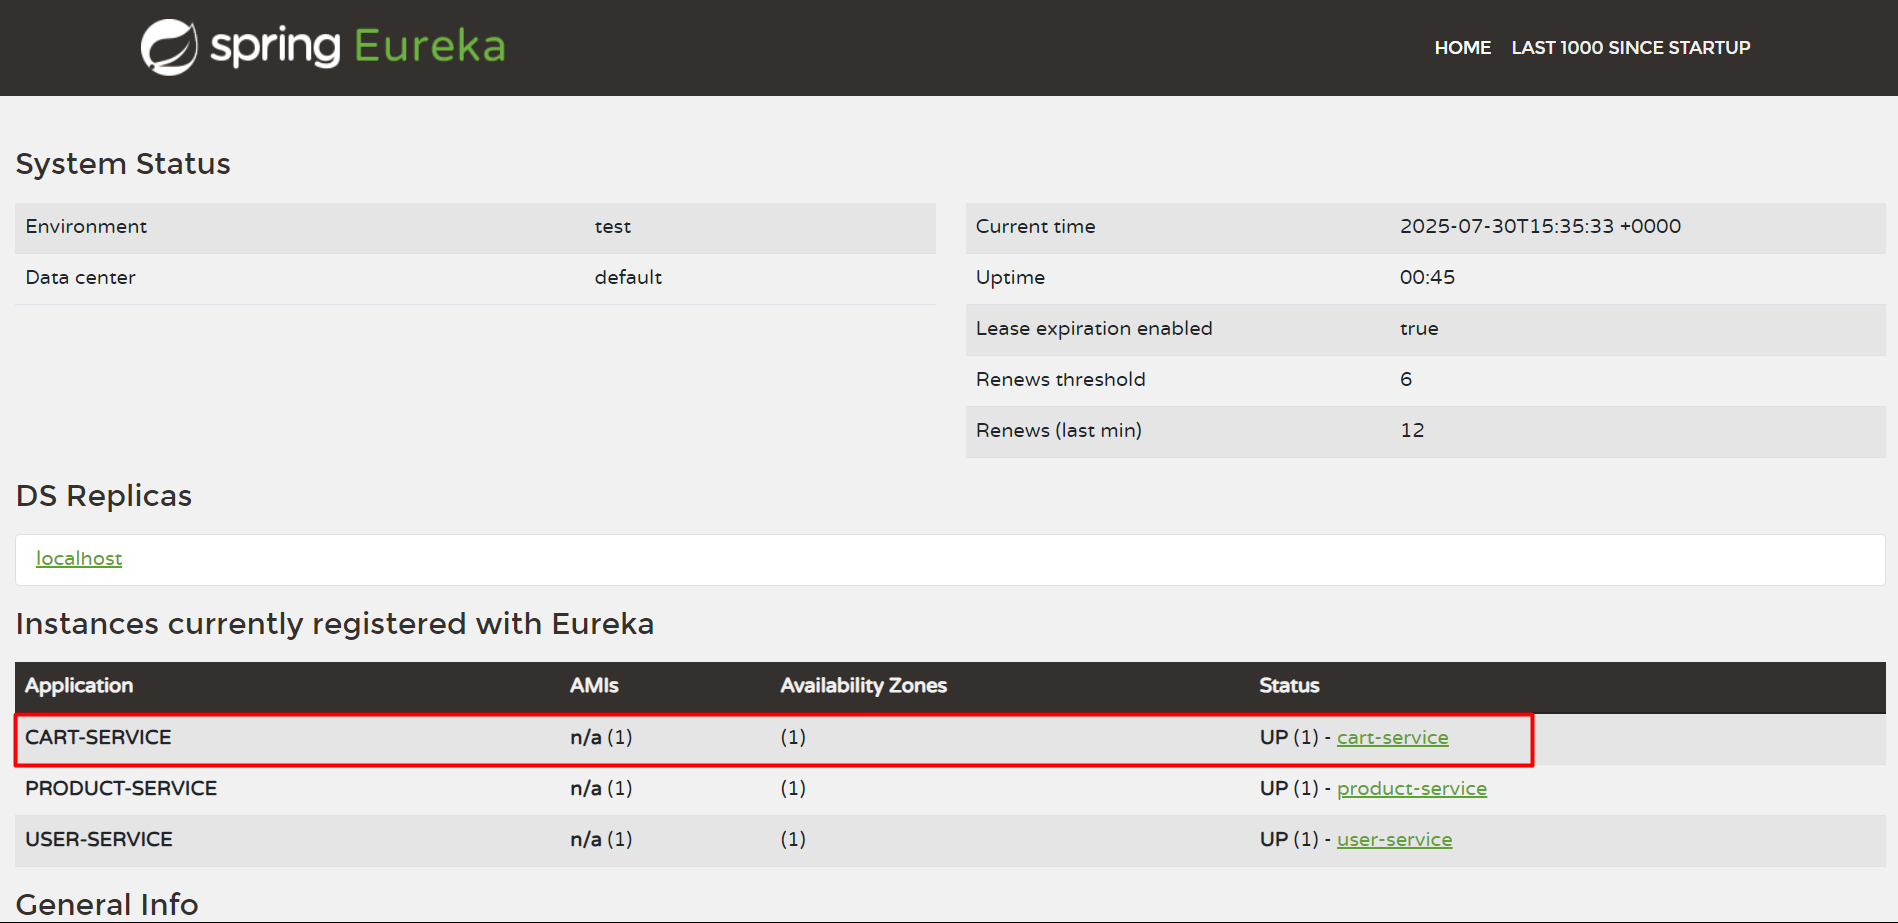
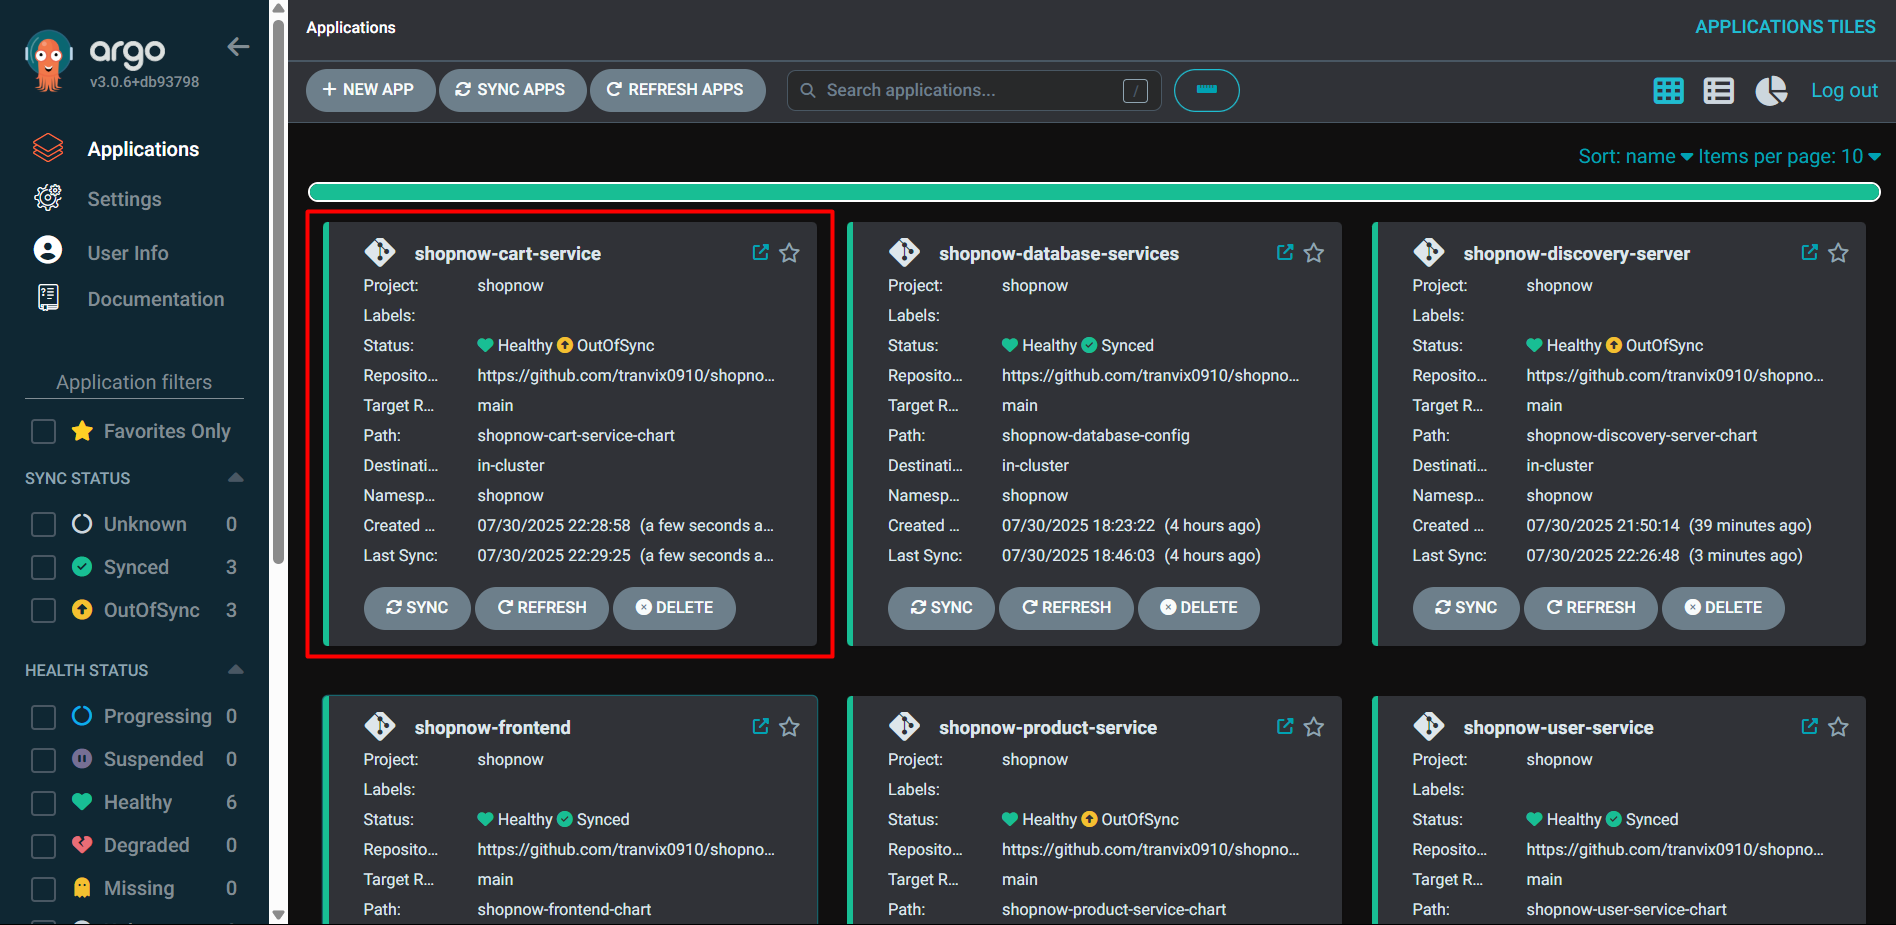
Thus, we have successfully deployed Cart Service.
Config Service
Config Service will be deployed similarly.
apiVersion: argoproj.io/v1alpha1
kind: Application
metadata:
  name: shopnow-config-server
  namespace: argocd
spec:
  destination:
    namespace: shopnow
    server: https://kubernetes.default.svc
  source:
    path: shopnow-config-server-chart
    repoURL: https://github.com/tranvix0910/shopnow-backend-config.git
    targetRevision: main
    helm:
      valueFiles:
        - values.yaml
        - ../shopnow-config-server-config/overlays/production/values.yaml
      values: |
        image:
          repository: "<ACCOUNT_ID>.dkr.ecr.ap-southeast-1.amazonaws.com/shopnow/shopnow-config-server"
  project: shopnow
  syncPolicy:
    automated:
    prune: true
    selfHeal: true
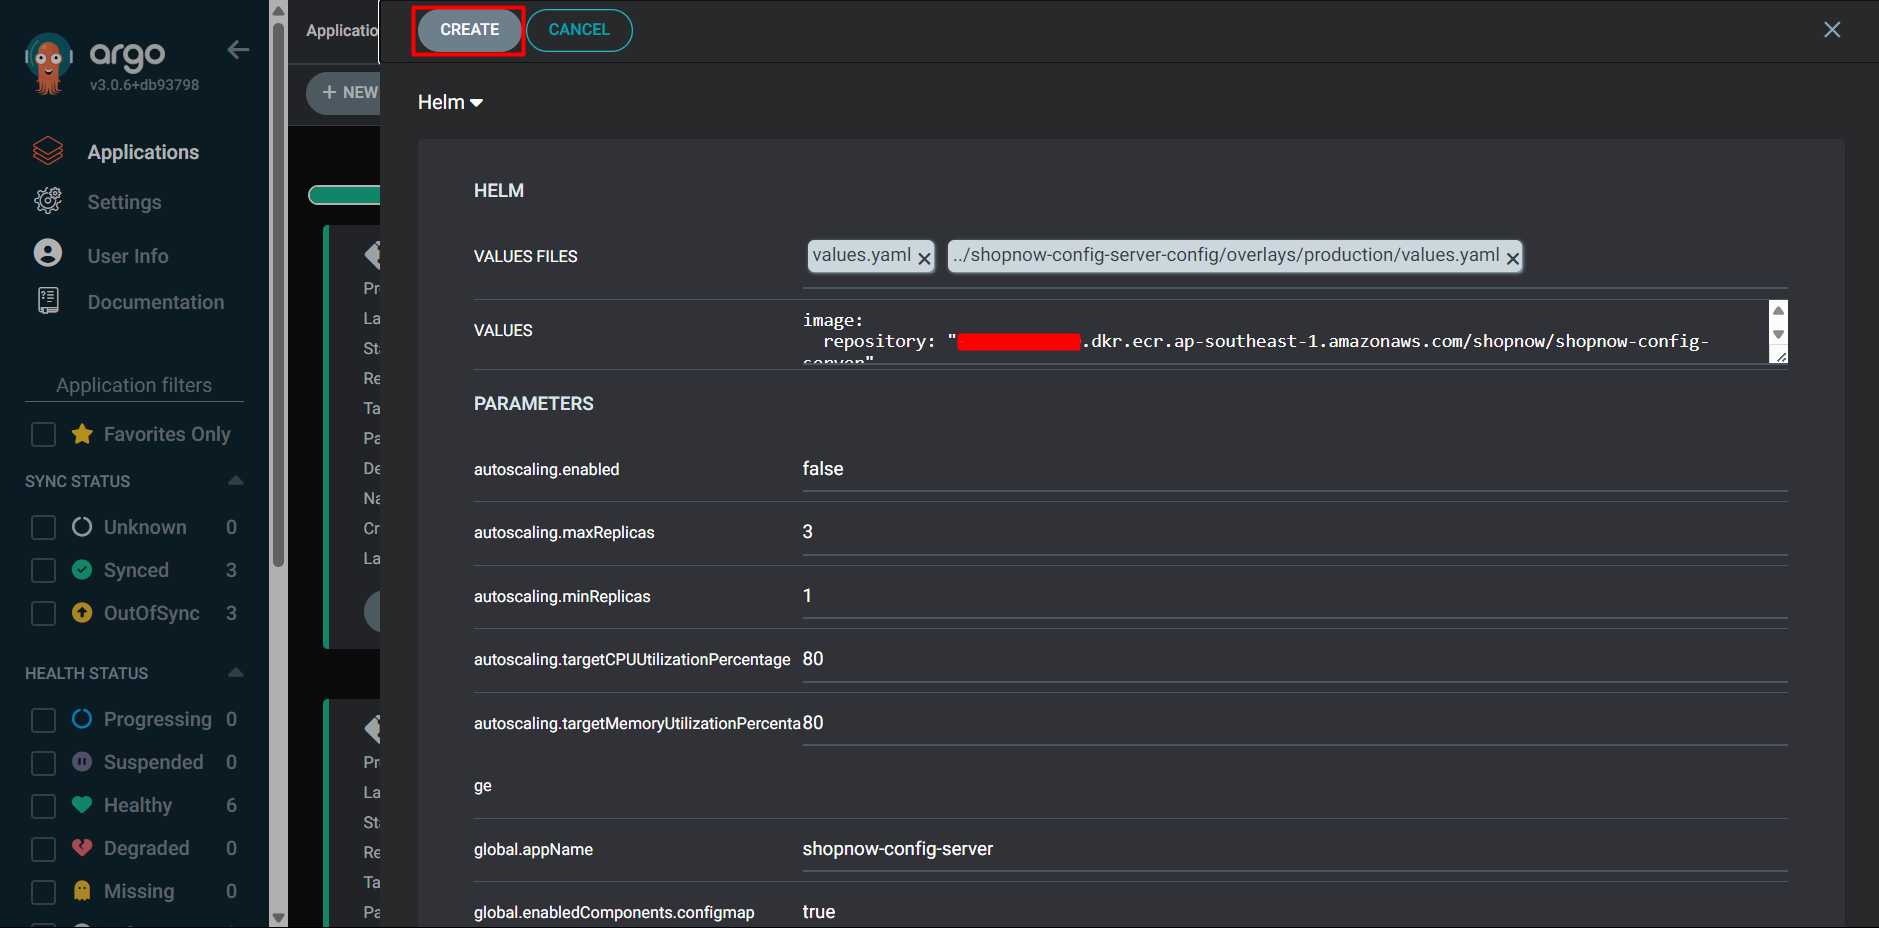
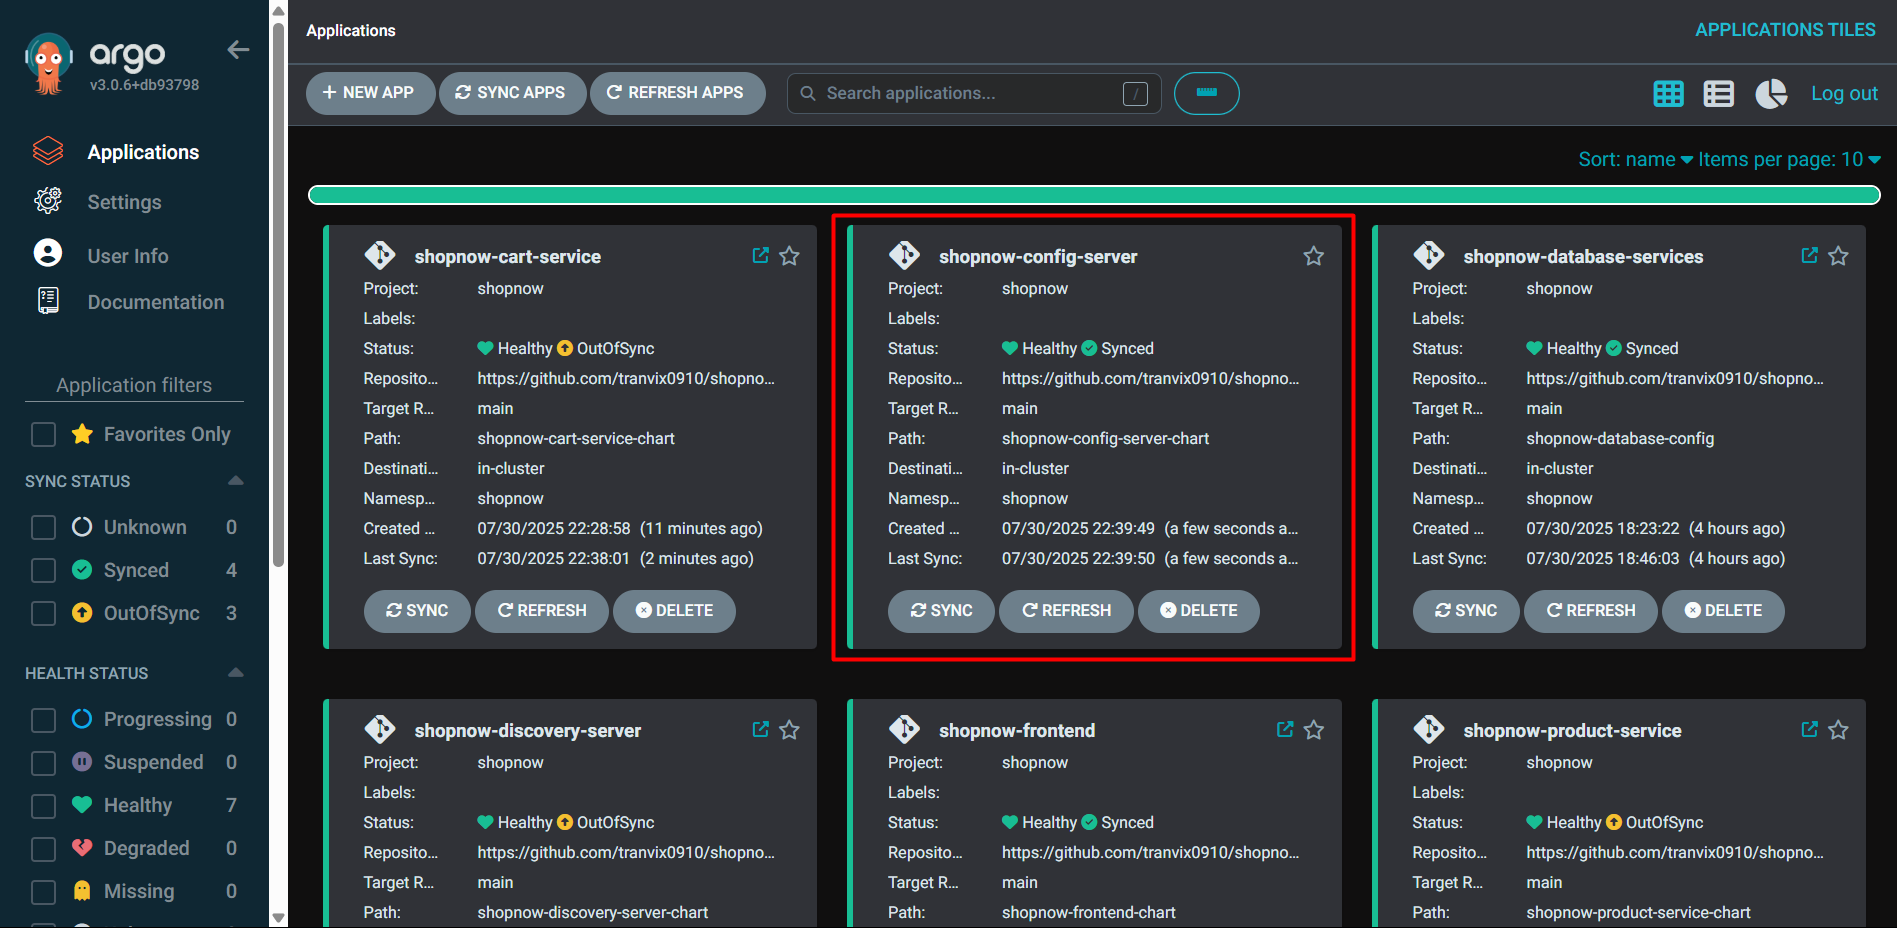
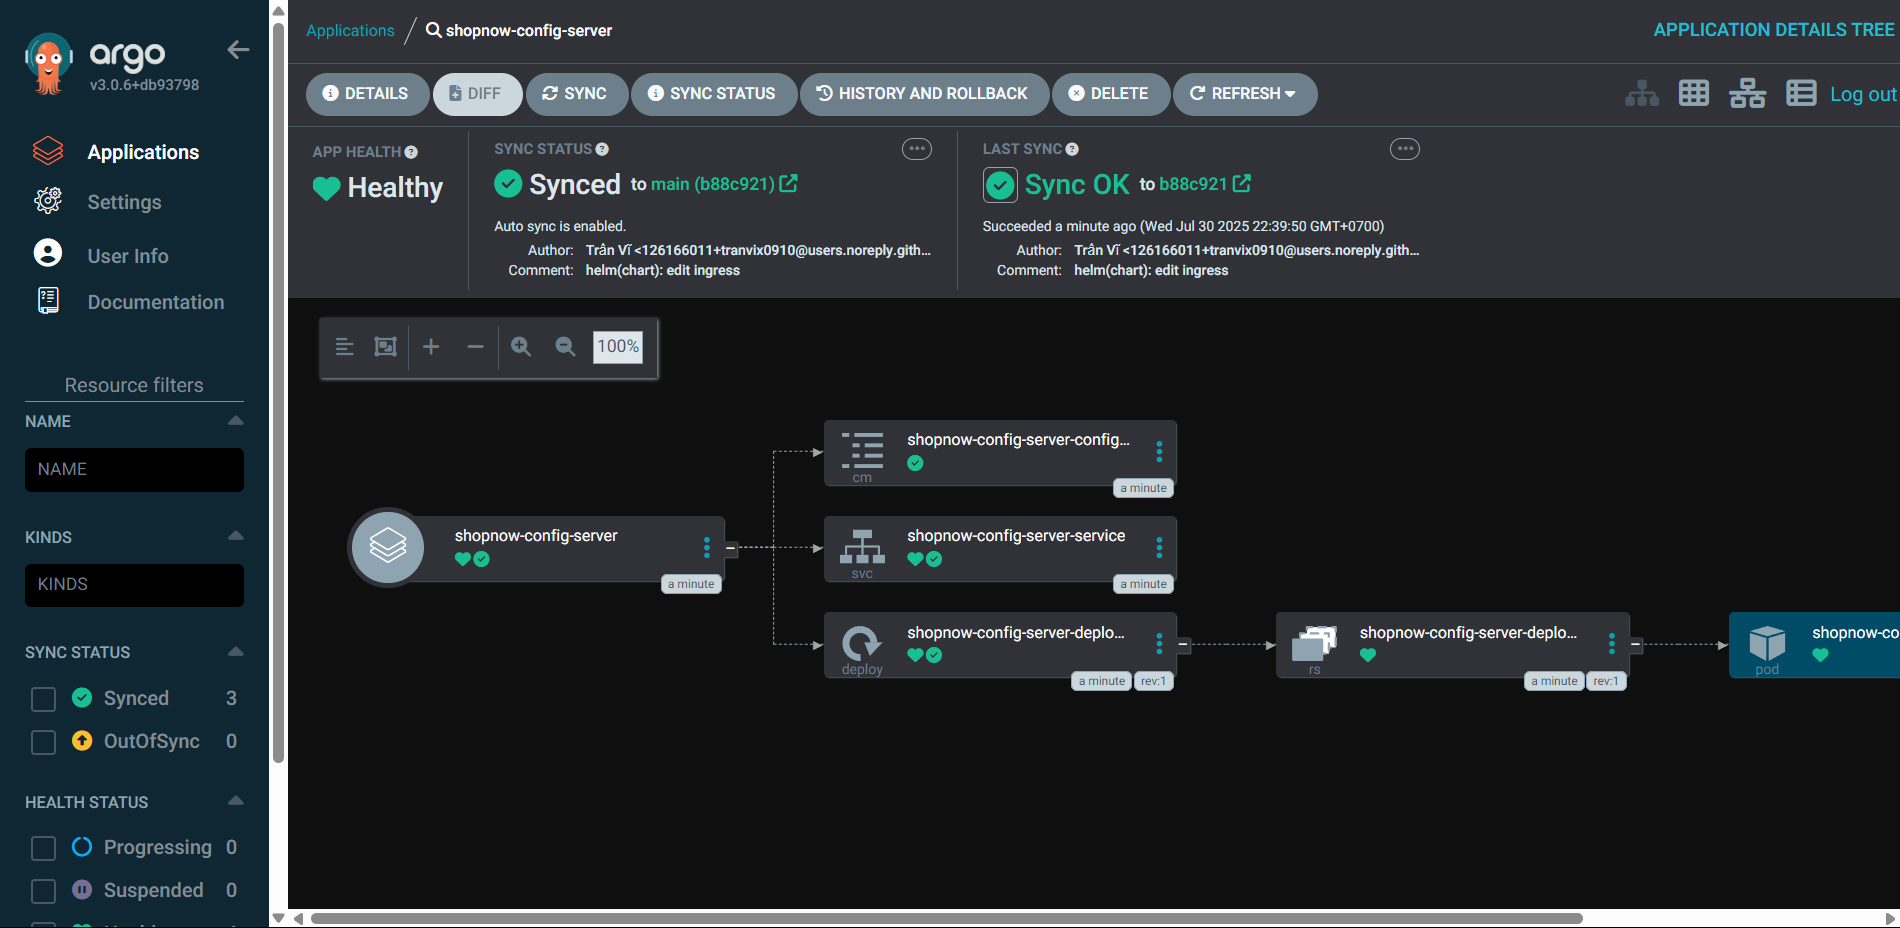
Thus, we have successfully deployed Config Service.